
Monoprinting without the Press – How to Use Gel Press Gel Printing Plates and Carabelle Studio Printmaking Accessories
10 min read [ad_1]
Gel Press Gel Printing Plates let you enjoy printmaking – but without the fuss of a press! Use them to create ‘one-off’ pieces of art with none of the hassle of traditional printing techniques. Fantastic for fine art and craft applications – Gel Printing Plates are perfect for enhancing art journals, scrapbook pages and card fronts.
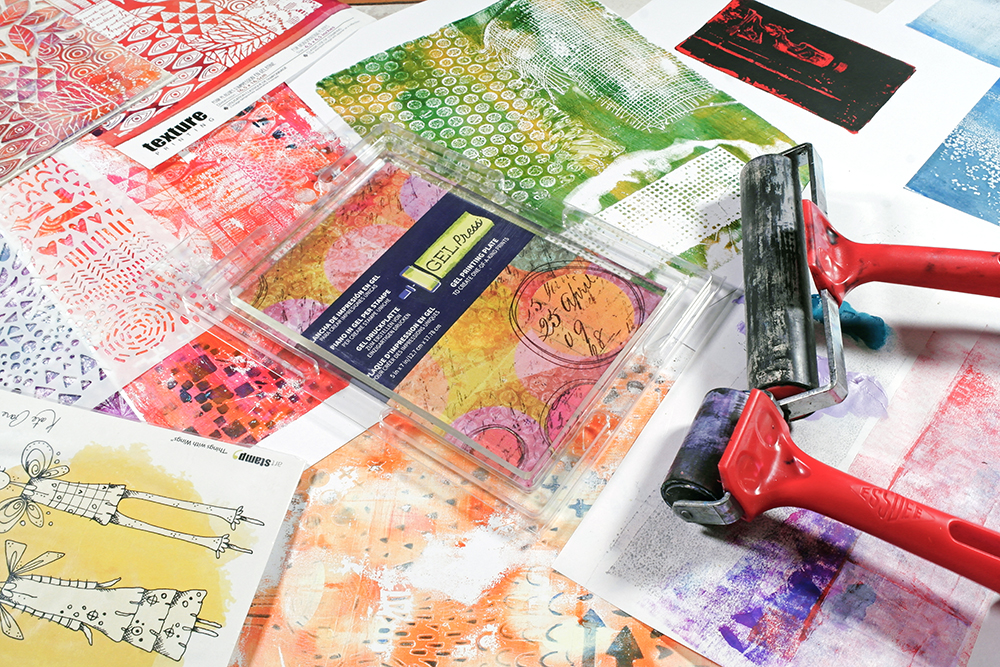
Gel Press Gel Printing Plates are a modern take on traditional gelatin printing. They offer many benefits over printing on plexiglass or gelatin. They’re also non-toxic, latex-fee and 100% vegan! Unlike some traditional printing techniques, monoprinting with a Gel Plate doesn’t require any sort of press. You just need your plate, some paint and a surface to print onto and you’re good to go. They’re also infinitely reusable! Just clean your plate with soap and water after use, allow to dry and it’s ready to go for your next printmaking session.
Gel Printing Plates are simple tools to use, and you can use them with all different kinds of media. The creative possibilities really are endless! Read on to find out more about monoprinting with a Gel Plate, or follow the links below to navigate to a particular topic.
What is a Gel Press Gel Printing Plate?
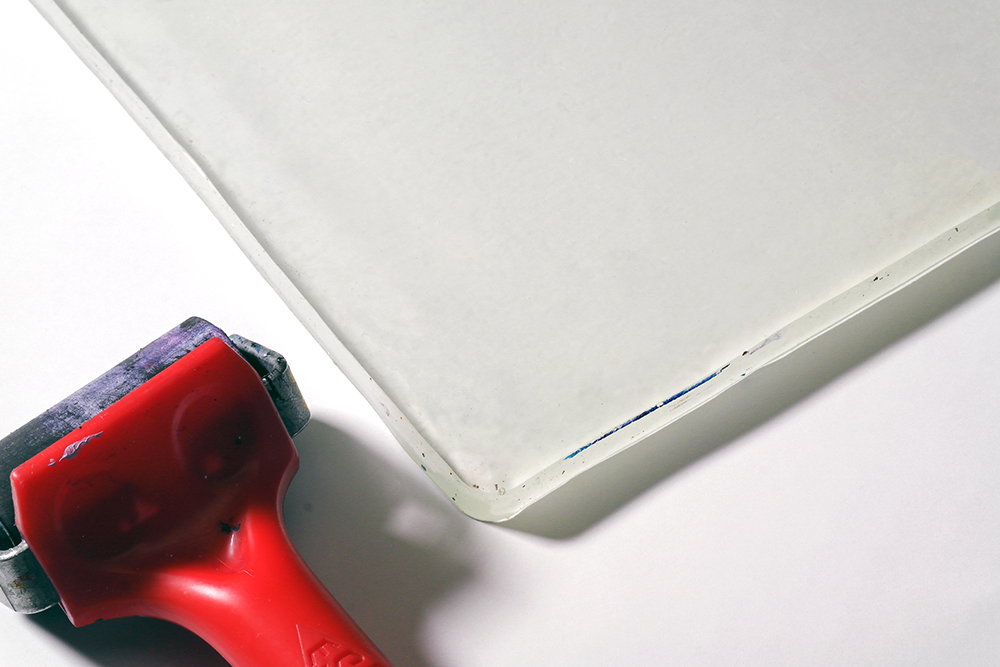
Gel Printing Plates have the look and feel of a gelatin plate – but they are completely gelatin free! Each plate is transparent and has a flexible, receptive surface perfect for printing. The material they are made from is extra sensitive and specially engineered to easily release media. You can easily ‘pick up’ even the fastest drying media (like alcohol inks) with a layer of acrylic or acrylic medium. This allows you to pull prints that are full of crisp details and patterns – all with no fuss. Gel printing plates can be used over and over again. Once you’ve finished printing just wipe them down, clean off any residue and they’re ready to use again and again and again. Loved by crafters and fine artists alike, these plates offer an easily accessible way to explore printmaking.
What is Monoprinting?
Any printmaking process involves making an impression on paper (a print) where paint or ink has transferred from one surface to another. While some printmaking processes allow you to take multiple prints from a single plate, monoprinting creates a single image. This single image is completely unique. Monoprinting is a great printmaking technique for beginners. The gratification is immediate and you’ll require relatively little equipment.
Which paints can I use with my Gel Press Gel Printing Plate?
You can work in all kinds of media with a Gel Press Gel Printing Plate. Choose from Acrylic Paint, Water-soluble Printing Inks, fabric paint, Brusho, Alcohol Inks and more! You can also use Oil Paints – but don’t leave them on your plate for too long!
Acrylic Paints
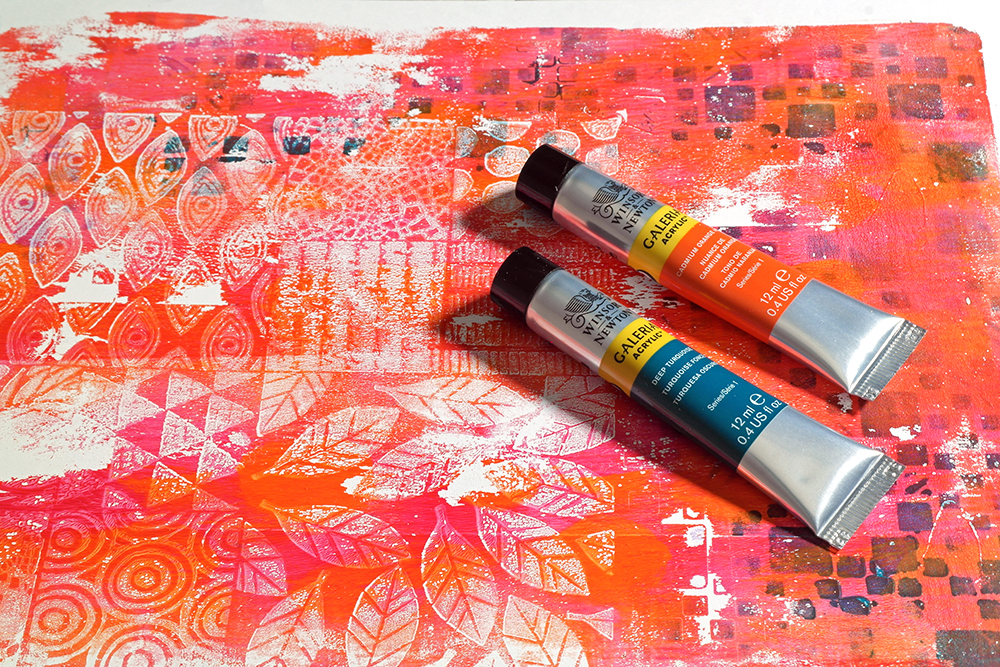
Acrylic Paints are perhaps the most popular medium of choice for monoprinting with a Gel Plate. Soft Body Acrylic Paints are the ideal consistency for printmaking, but they do dry quickly. If you require a little more working time you can mix retarder or slow drying medium with your acrylics. Alternatively you could use Golden Open Acrylics. These paints have a slow drying formula, giving you more time to compose your print.
Oil Paints & Pigment Sticks
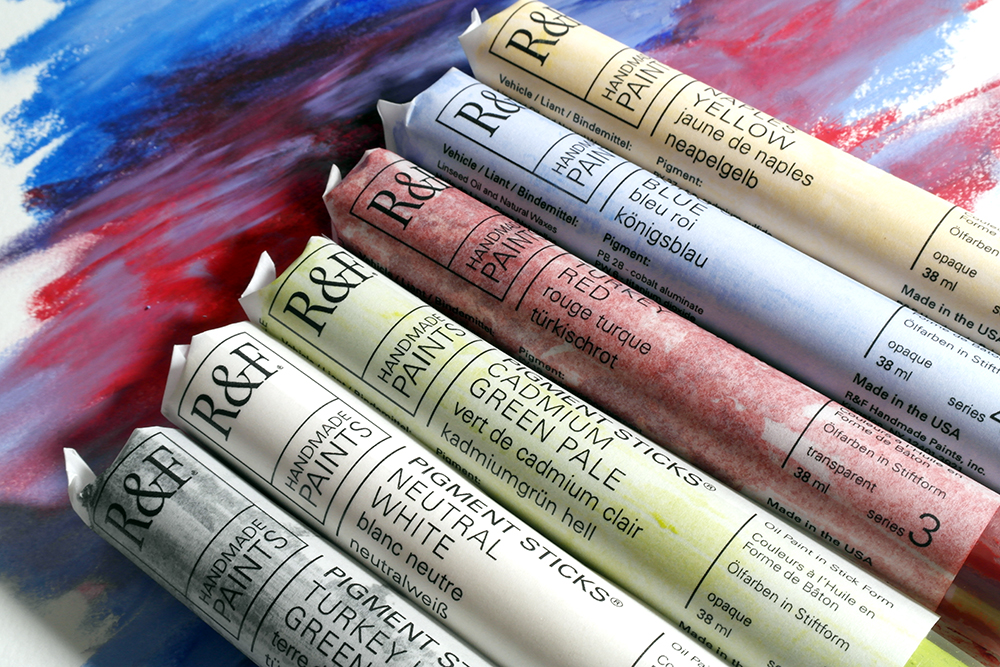
Oil Paints and Pigment Sticks are very slow drying – giving you ample opportunity to blend colour and build up your print using textures and patterns. Try using a brayer to mix blend colours on the plate, or lift and deposit colour using a stamp. If you do use oil based paints in your printmaking process, it’s important not to leave them on the plate too long as they can cause the surface to soften.
Alcohol Inks
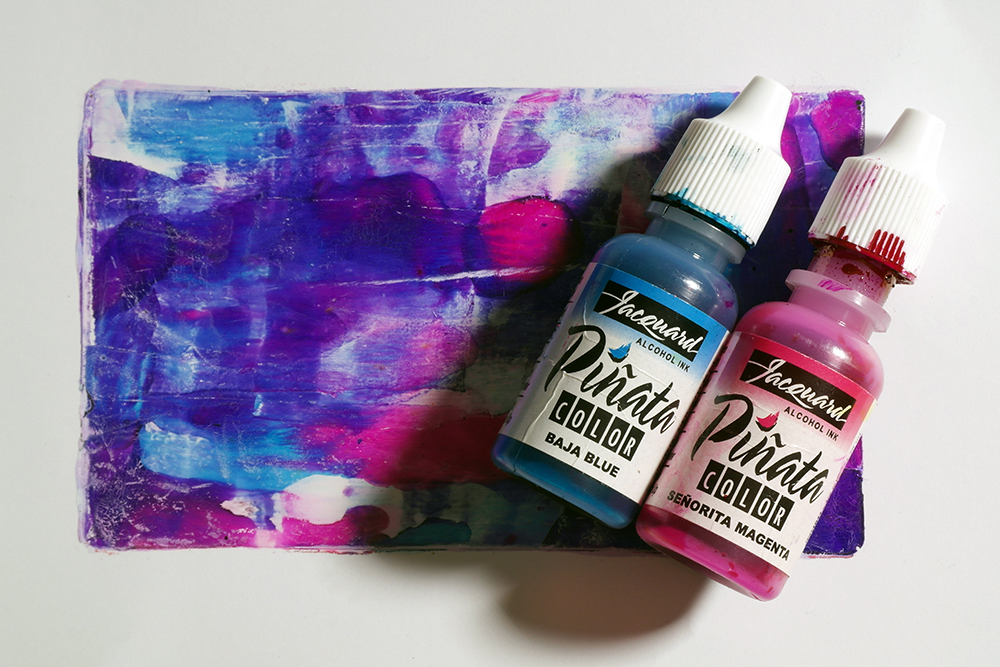
Alcohol Inks have an even shorter open time than acrylic paints – giving you even less time to work with stencils and textures! Drop alcohol ink directly onto the surface then move and blend for the short time they are workable. You can also use stamps to remove colour from the surface. Alcohol Inks are wonderfully vibrant and retain lots of detail. Once dry the ink layer forms a ‘skin’ of colour on top of the plate. You can’t lift this skin just by pressing your paper onto the plate. Instead, you’ll need to apply a layer of acrylic over the ink. When you press your surface onto the acrylic and pull your print the acrylic will adhere to the Alcohol Ink skin and pull it away from the plate.
Brusho
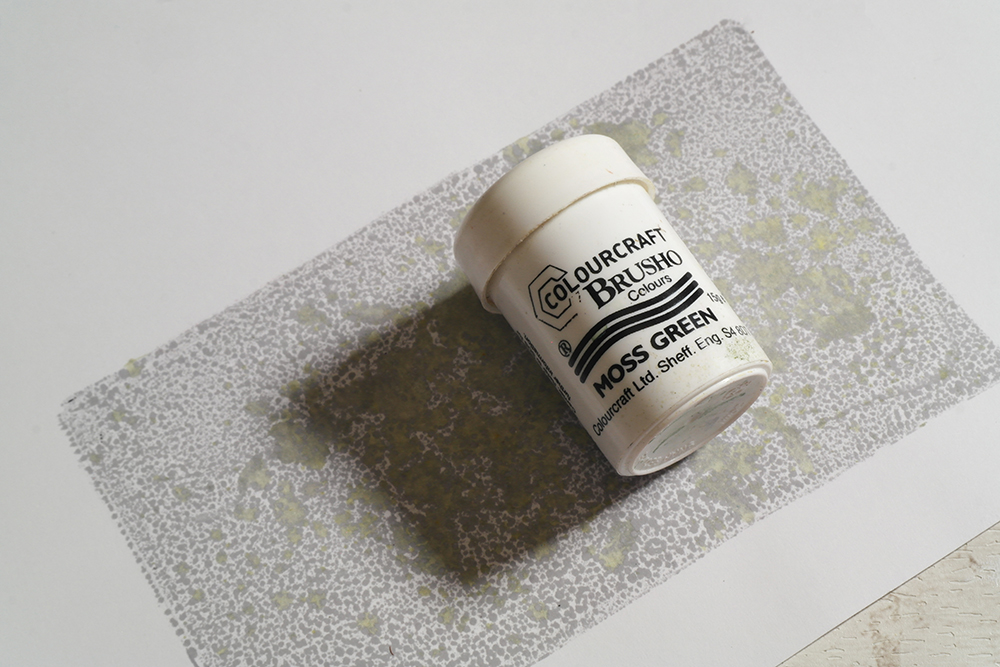
Brusho Crystal Colours are powdered paints that transform into vibrant inks with the addition of water. The powder can be pre-mixed with water to create fluid colour that can be dripped and flicked onto your plate. With this kind of application you’ll notice the inks bead up on the surface. It’s a great method for creating coloured backgrounds. Brusho can also be sprinkled into acrylic paints and mediums to mottle them with colour.
If you are using professional quality colours you’ll find that a little paint goes a long way. You’ll need very little to cover your plate entirely! This is because they are much more highly pigmented than student grade colours. It’s also worth noting that opaque and translucent colours give very different effects. Try out a mixture of both and see how they affect your prints!
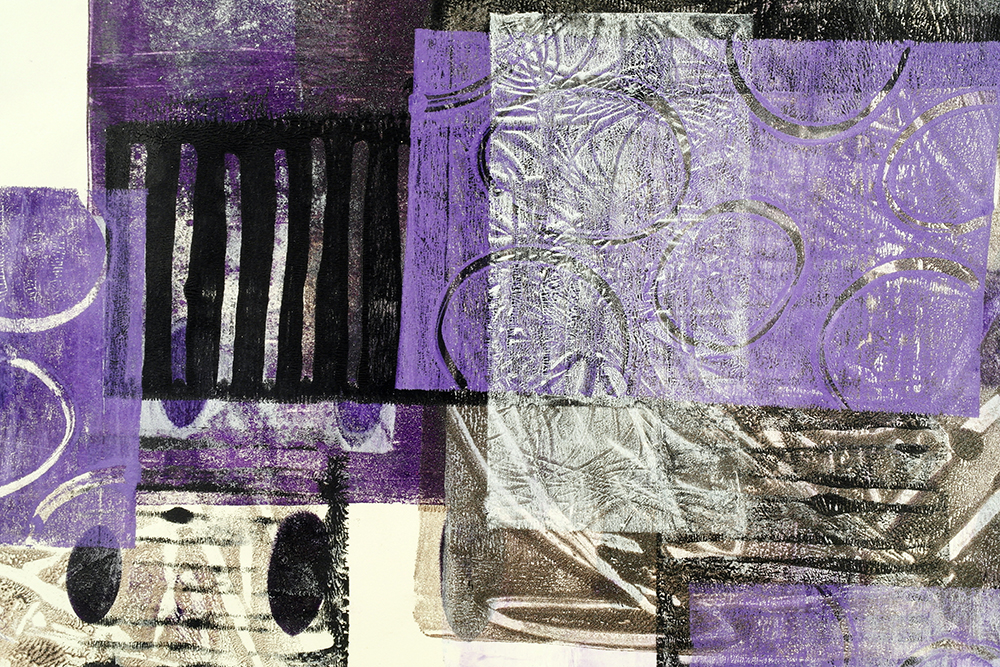
Accessories to Use with your Gel Plate
The key to a successful print is layering. You can add texture to each layer with all kinds of wonderful things. Our Carabelle Studio printmaking accessories include a number of stamps, stencils, masks and textures that can be used to add interest to your prints.
Carabelle Studio Art Masks
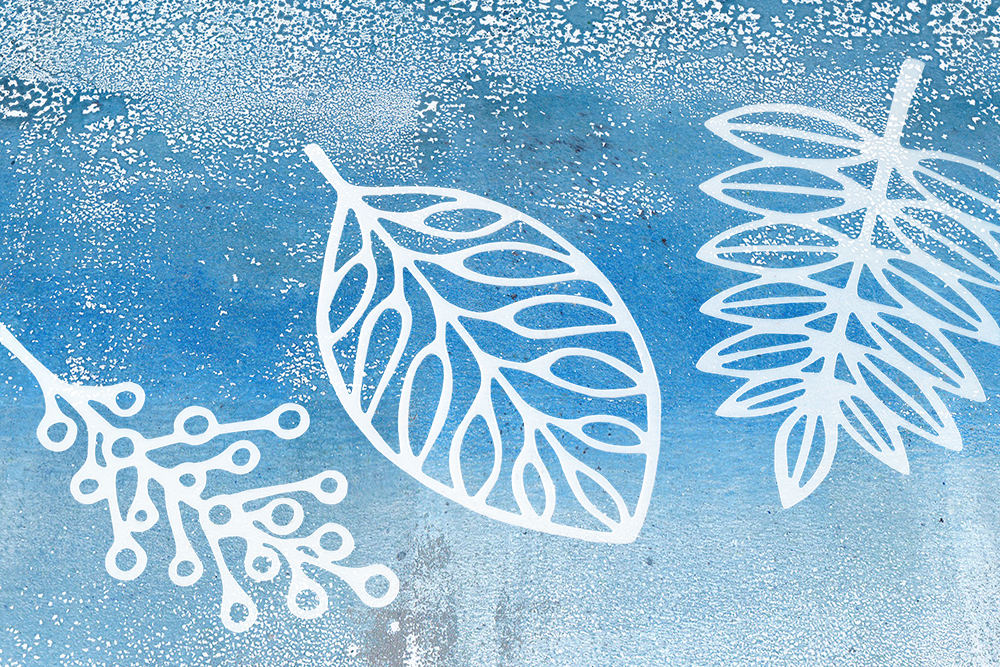
Carabelle Studio Art Masks are flexible plastic sheets that each feature a pattern or design. They work like a ‘reverse’ stencil. Any areas you cover with the mask will be protected from the colour you apply – kind of like how you would apply masking fluid in watercolour painting. Just place your mask onto the Gel Plate, apply colour or medium over the top, pull away the mask and the motif will be revealed.
Carabelle Studio Art Printing Texture Plates
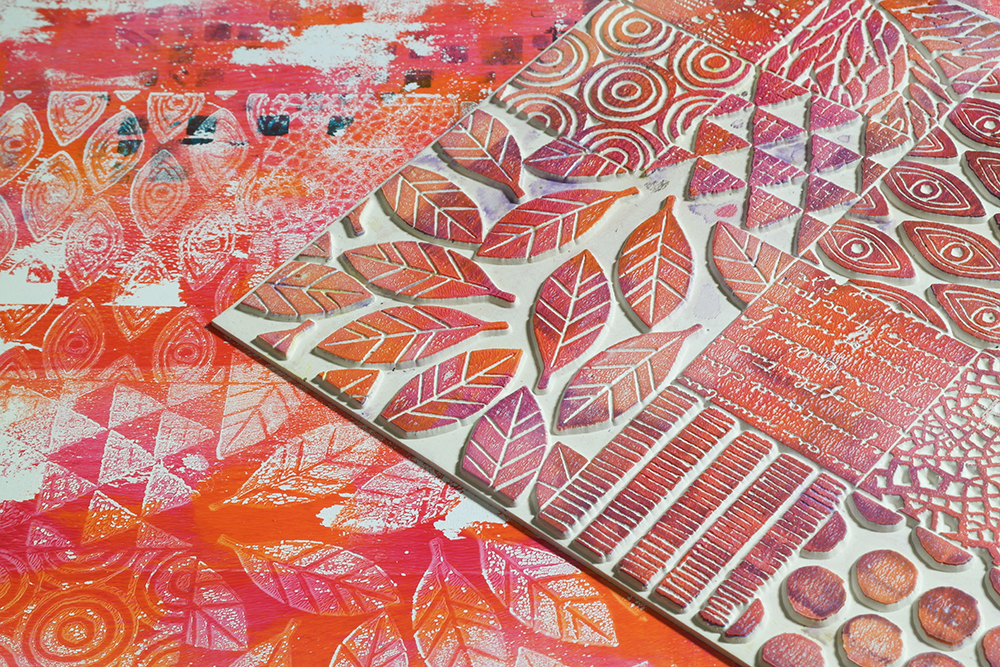
Carabelle Studio Art Printing Texture Plates are unmounted rubber blocks featuring an assortment of whimsical designs cut into a relief. They offer a great way to introduce pattern and texture into you prints. To use a Texture Plate just ink up your gel plate with your chosen colours then press down the plate in the area you want the pattern to be. You’ll need to make sure you apply gentle pressure to ensure the design relief comes into contact with the ink on your plate. Peel the texture plate away. As you peel the rubber plate away it will remove the ink in the areas the relief pattern touches. This impression left by the texture plate will be visible in your final print.
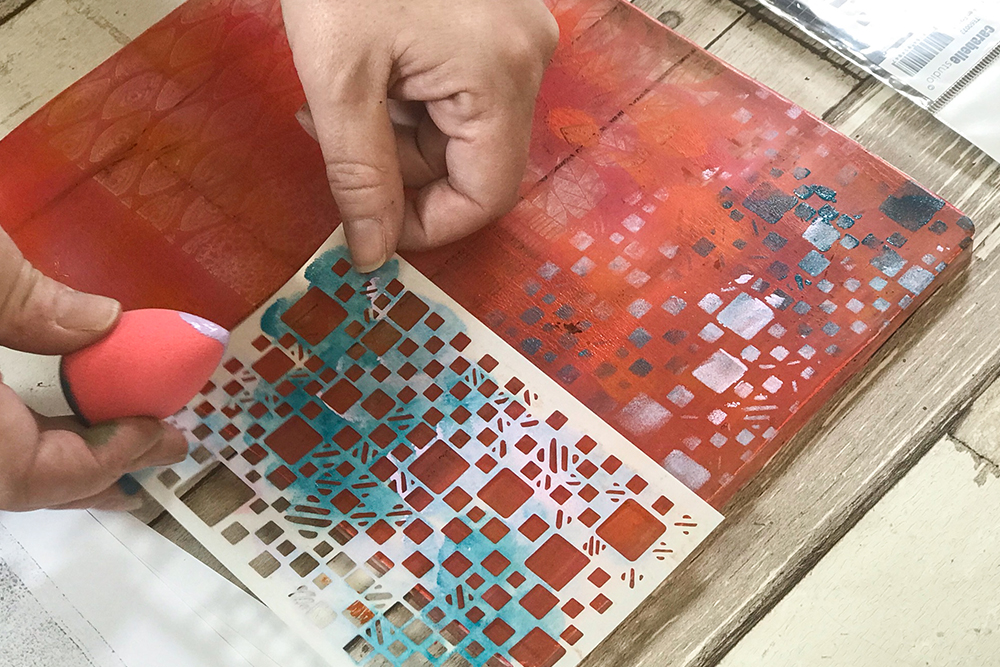
Carabelle Studio Art Stencils
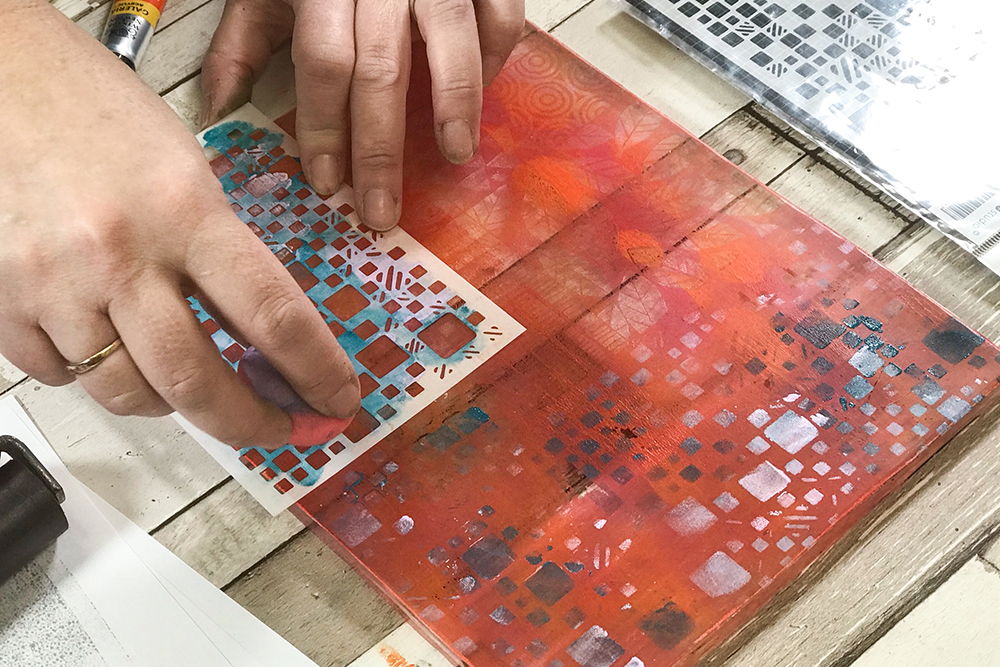
Carabelle Studio Art Stencils are laser cut plastic sheets featuring patterns and motifs in crisp, clear detail. They work the same as any standard stencil – lay down the stencil sheet, apply colour over the top, peel the stencil away and the design will be transferred onto your gel plate.
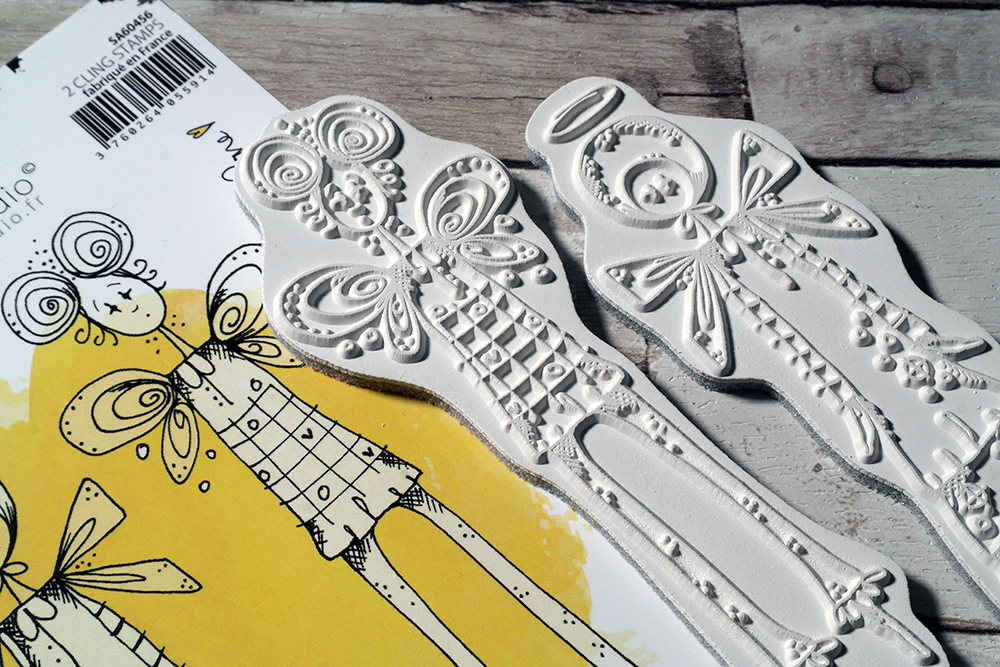
Carabelle Studio Cling Stamps
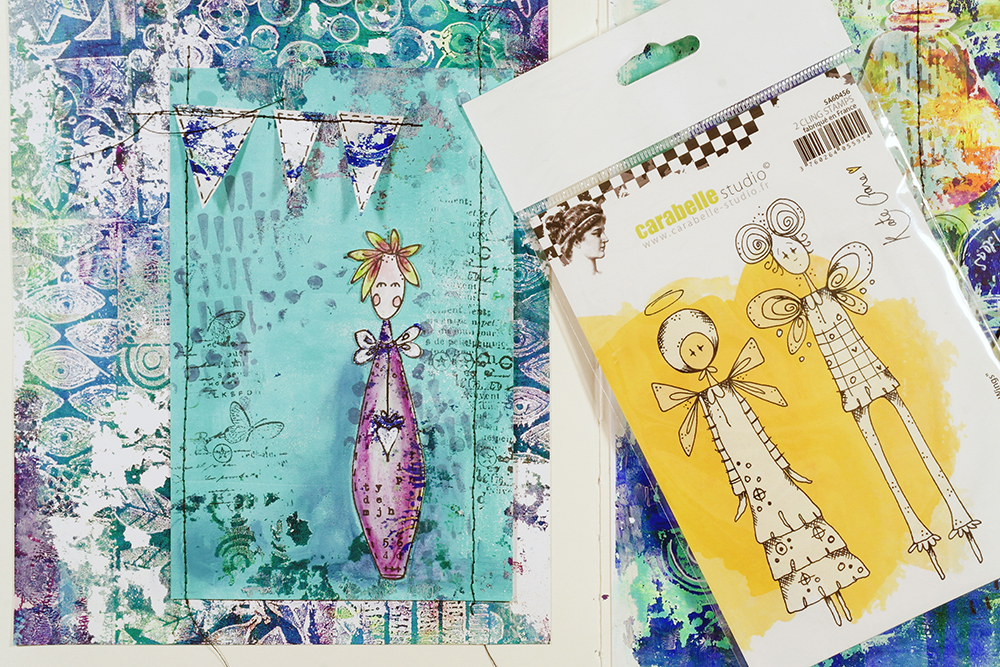
Carabelle Studio Cling Stamps are high quality art and craft stamp. They are made from durable white rubber with an EZ foam mount backing. Each stamp has a deep etched design that will print clear and crisp on your gel plate. You can use stamps in a number of different ways. Try coating the raised design of the stamp with ink – try our Tsukineko Memento Ink Pad or Tsukineko StazOn Ink Pad for a really crisp print. Apply the inked stamp to paper and you’ll be left with an outlined, black design. You can leave this design as is, and incorporate it into your prints, or colour it in with paints or inks (like in the example above). Stamps can also create a ‘negative image’ on a gel plate. To make a negative image, press the stamp into an inked plate. Apply a bit of pressure to get good contact between the stamp’s design and the plate surface. Peel back the stamp and the ink on your plate will lift in the areas the stamp has touched.
Other Accessories
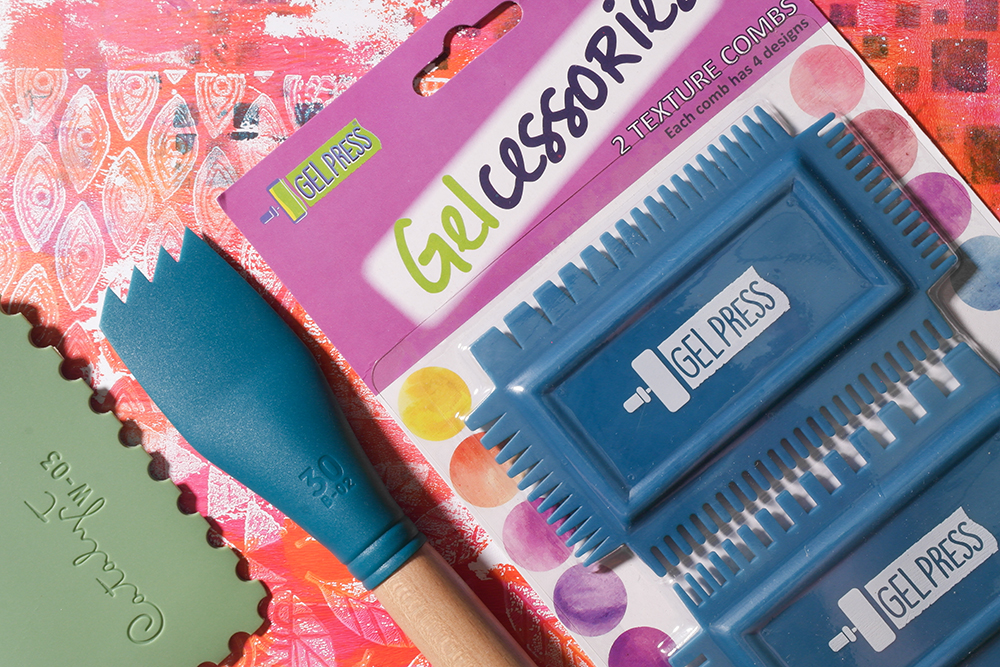
Brayers (or rollers) are an essential tool that will help you cover your plate in a smooth, even layer of ink. You can also use brayers to blend or mix colour either on your palette or the gel plate. You can also use Gel Press Gelcessories Texture Combs to create patterns and textures. These combs are made from soft plastic and have different comb designs on each side.
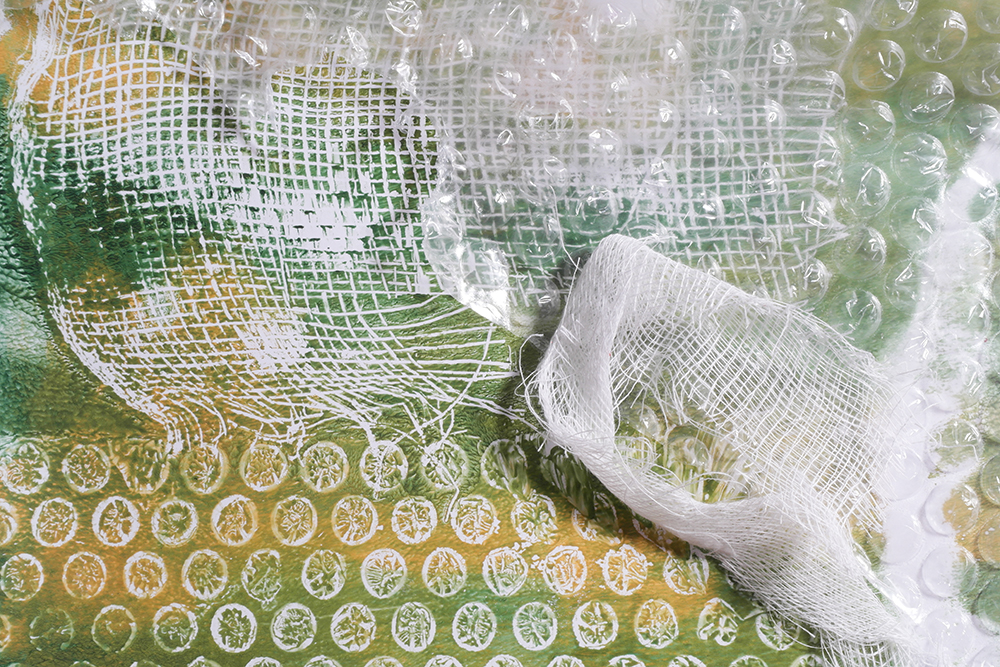
Don’t limit yourself to using just stencils and masks – you’ll probably find all kinds of wonderful things around the house that you can use to create texture. Try using fabrics, dried plants, bubble wrap, cardboard or handmade masks to create interesting patterns in your work.
Surfaces to Use for Monoprinting with a Gel Plate
Gel Plates perform best with smooth papers. A smooth surface means your print will capture each and every little detail from your gel plate. Using a surface with more texture will give a rougher print with areas of broken colour. Snowdon Cartridge Paper has the perfect texture for achieving high detail prints. If you’re just looking to test out ideas then newsprint offers an economical surface.
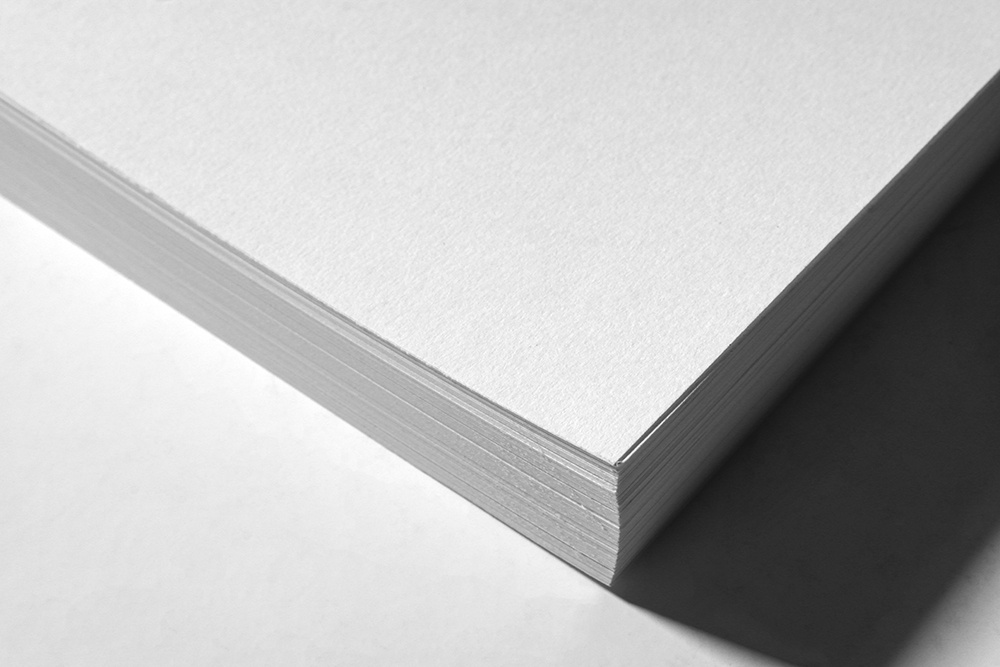
As a rule, almost any smooth paper will work for this type of printmaking. The only types of paper you should avoid are glossy coated papers – like photography paper. These papers can stick to the surface of the gel plate and damage it permanently.
Pulling a Print with a Gel Press Gel Printing Plate
Creating a print using a Gel Printing Plate couldn’t be easier and ultimately comes down to just 3 simple steps. Just make sure you have the following products to hand and you can start creating your print:
Materials You’ll Need:
Gel Print Pulling Method
Step One: Prepare your brayer with colour
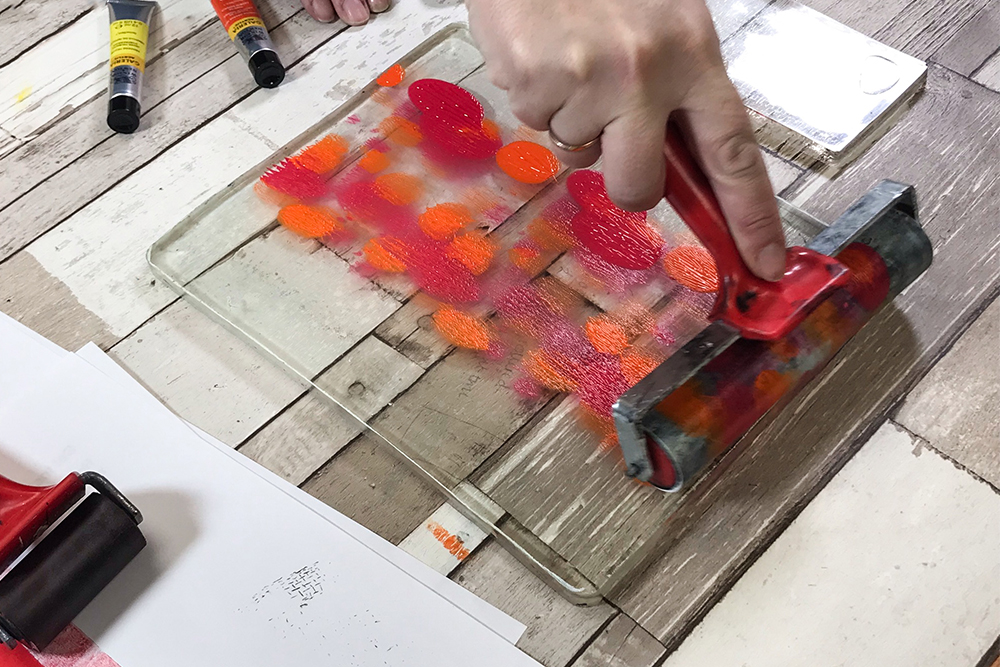
Take a brayer and ink it up with whichever colour paint you’d like to start with. Remember that this first layer will also be the first, foremost layer when you pull your print.
Step Two: Create patterns and texture with printing accessories
Use silicone tools, stamps, brushes, masks and other accessories to make patterns and textures in your design. You can scrape away colour, create lines and marks. Drawing into the colour with brushes can create some great, painterly marks.
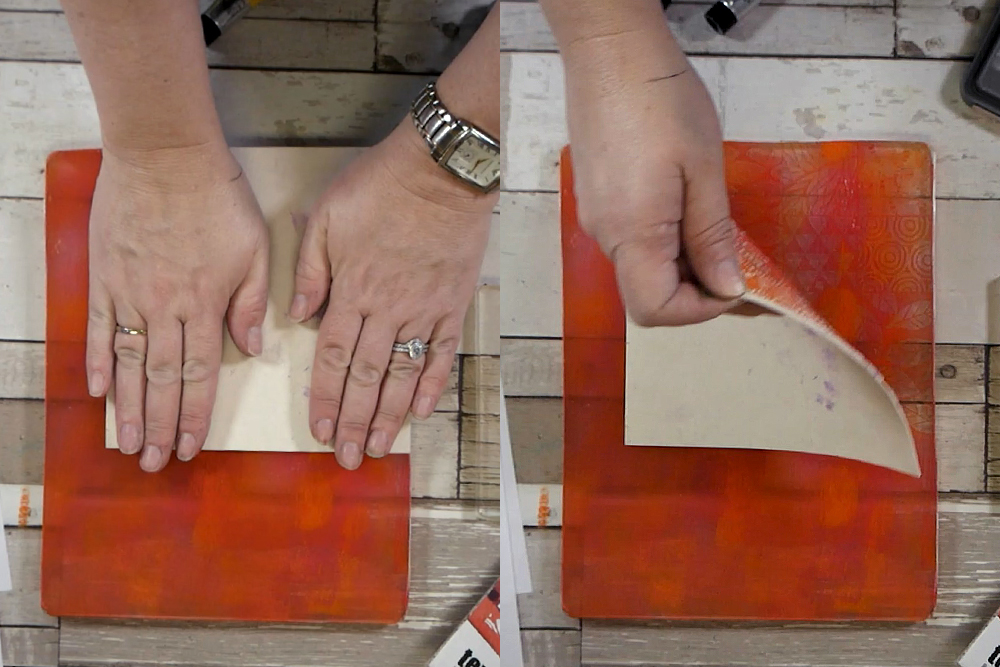
Step Three: Transfer your design onto paper
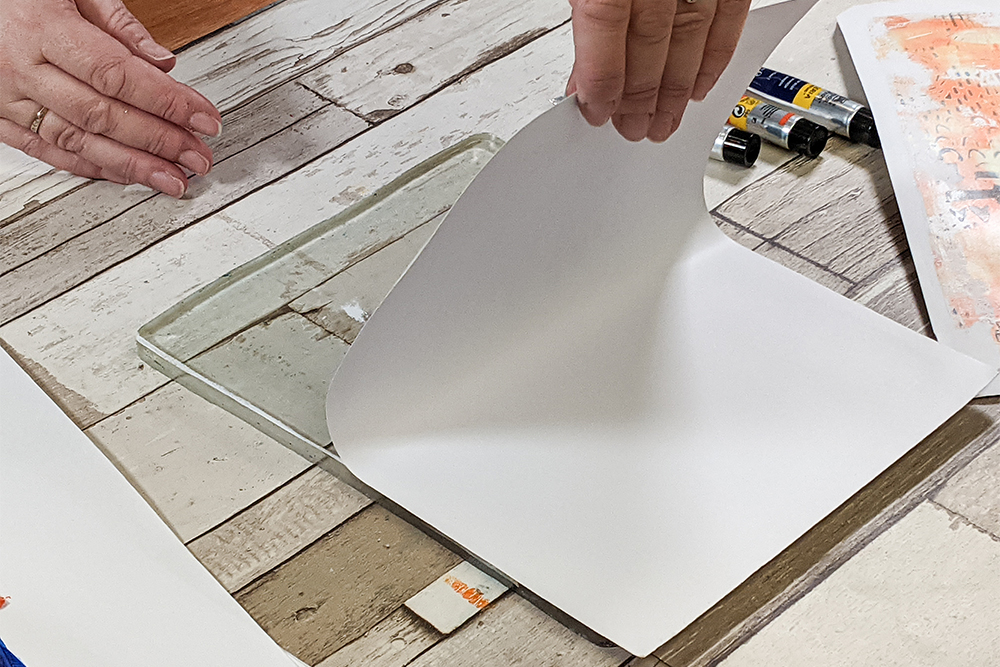
Once you’ve finished composing your design you’re ready to pull your print! Just gently press your chosen paper down onto the plate, and peel back the paper to release your print! If you use masks, stencils or textures pay particular attention to these areas when pressing your sheet on the plate. This will ensure that their edges are crisp.

Printmaking Tips
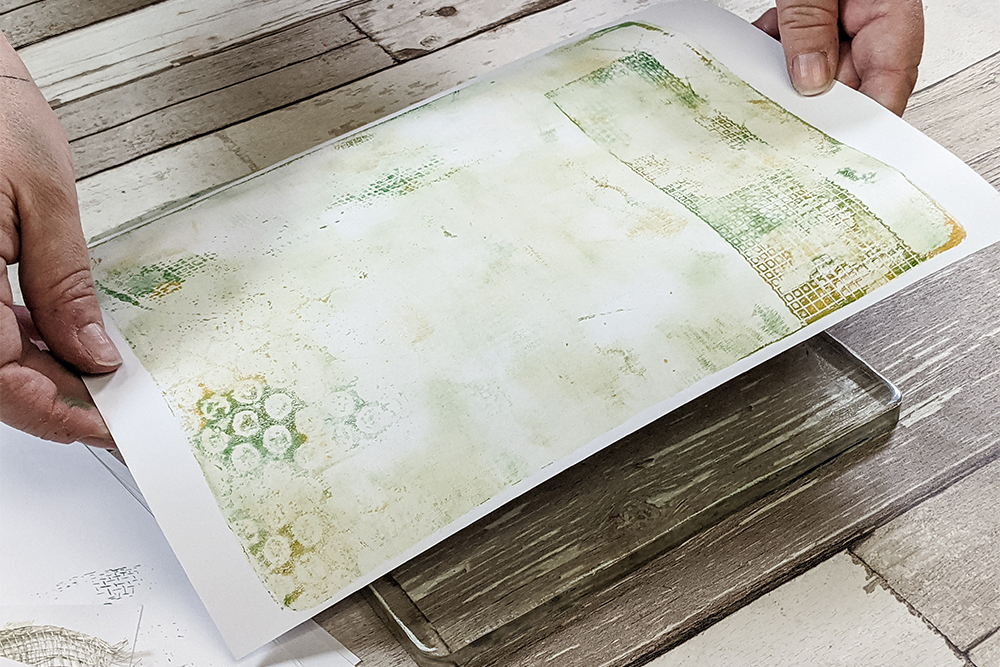
Although these three simple steps will create the most basic prints, there are so many other ways to experiment with printmaking. Gel printing is all about the layers – so layer up your designs, pull your prints and print again to create designs full of amazing little details. Be sure to allow each layer to dry before putting on your next. Once you’ve pulled your print you’ll notice paint residue left on the plate. Use another sheet of blank paper to press into the residue. Pull it back and you’ll create a subtle, negative image of your original print. This is known as a ‘Ghost Print’.
While you may not choose to use these as final prints, they’re fantastic for all kinds of creative projects including:
- Use a sheet only for ghost prints and create unique artwork made up from ghost prints alone.
- Make gift tags from your ghost prints or use them as sketchbook/journal embellishments.
- Incorporate them into card making projects.
- Cut them up and use them for collage.
- Use them as interesting backgrounds for drawings or sketches.
For a successful print, you’ll need to apply colour smoothly and evenly. You can also mix colours directly on the plate for interesting effects. If you’re trying gel printing for the first time, working on a small gel plate can be great for experimenting with pattern and technique.
Cleaning and Maintaining your Gel Plate
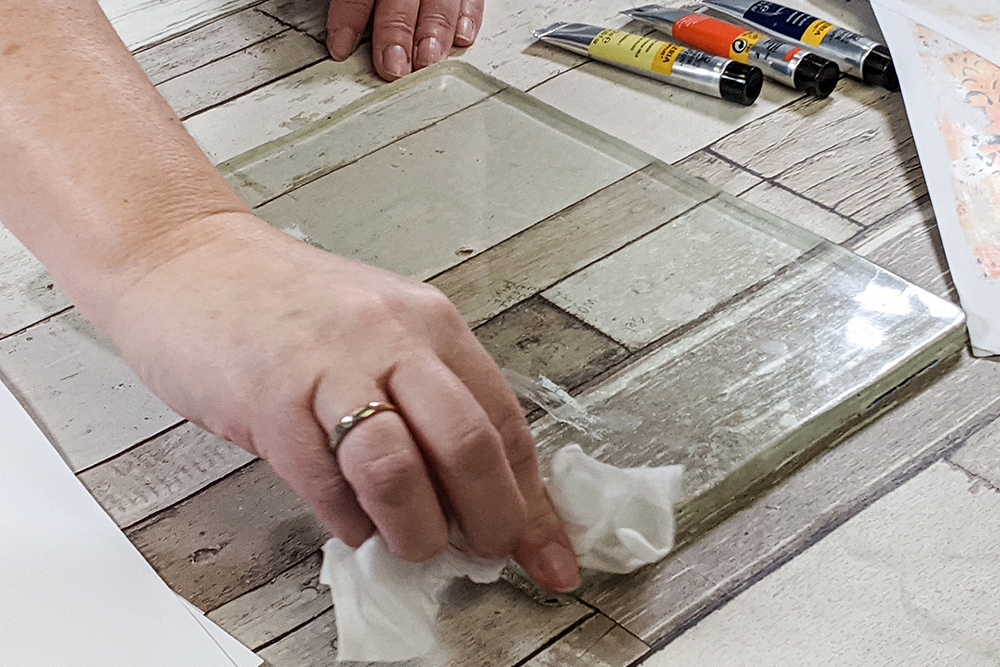
Gel Press Gel Printing Plates are very easy to clean. Once you’ve finished printing just wipe any residue from your plate then clean with soap and water. Store your plate in its original clamshell packaging – but remember to remove the Mylar sheet prior to storing. Store clean plates horizontally or vertically – just make sure they stay flat with no droops or bends. Try not to let any air bubbles, hair or debris make contact with the surface of your plate as it will affect the surface. It is important to store your plate on only non-absorbent surfaces. Storing it with absorbent materials will leach oil from your plate and cause it to deteriorate. Ultimately your goal should be to store the plate as flat as possible on a non-absorbent surface.
If something distracts you while your printing and your paints dry completely – don’t worry! You can still remove it. Just add a fresh layer of acrylic on top then pull your print as normal. The wet acrylic will lift the dry acrylic from your plate.
Give it a go and discover the wonderful world of Gel Printing!
Like a lot of techniques, the more you use your Gel Plate the more confident you’ll become and the better your skills will get. Gel Plates unlock infinite ways to enjoy printmaking – experimentation is the key!
Discover all our printmaking accessories on our website.
[ad_2]
Source link


