
Meticulously Mending Fragments of a Fan | by Cleveland Museum of Art | CMA Thinker | Mar, 2022
5 min read [ad_1]
By Adrienne Gendron, Gradutate Intern in Objects Conservation at the CMA
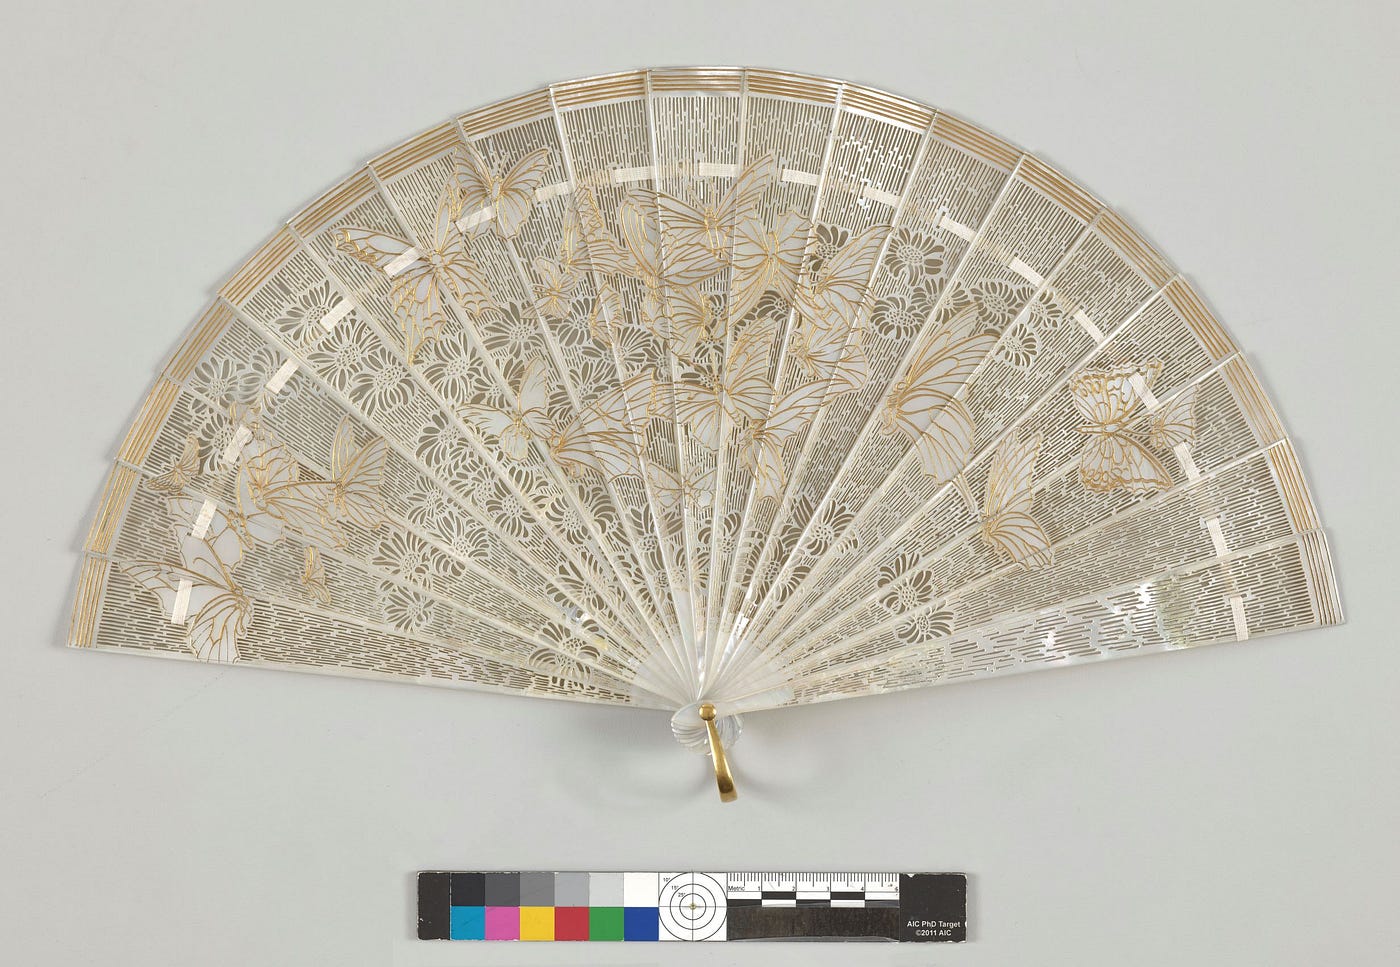
Few materials embody luxury more completely than mother-of-pearl and gold. This mother-of-pearl fan is composed of 19 slats with gold-colored inlay and cutout designs featuring butterflies and flowers (fig. 1). The fan was made by René Lalique, a French jeweler and glassmaker working at the height of the Art Nouveau movement in the early 20th century. At that time, artists began to refocus on the importance of the individual artist’s hand after a period of fascination with industrial processes. The Art Nouveau movement introduced an appreciation for organic forms, references to the natural world, and an affinity for Japanese style. Simultaneously, there was an outpouring of artistic effort into the realm of decorative arts, resulting in a rich period of creativity and ornamentation of everyday objects. Lalique was heralded as “the finest jeweler working in France” and was known for employing materials animated by light (Harrison 2008, 29).
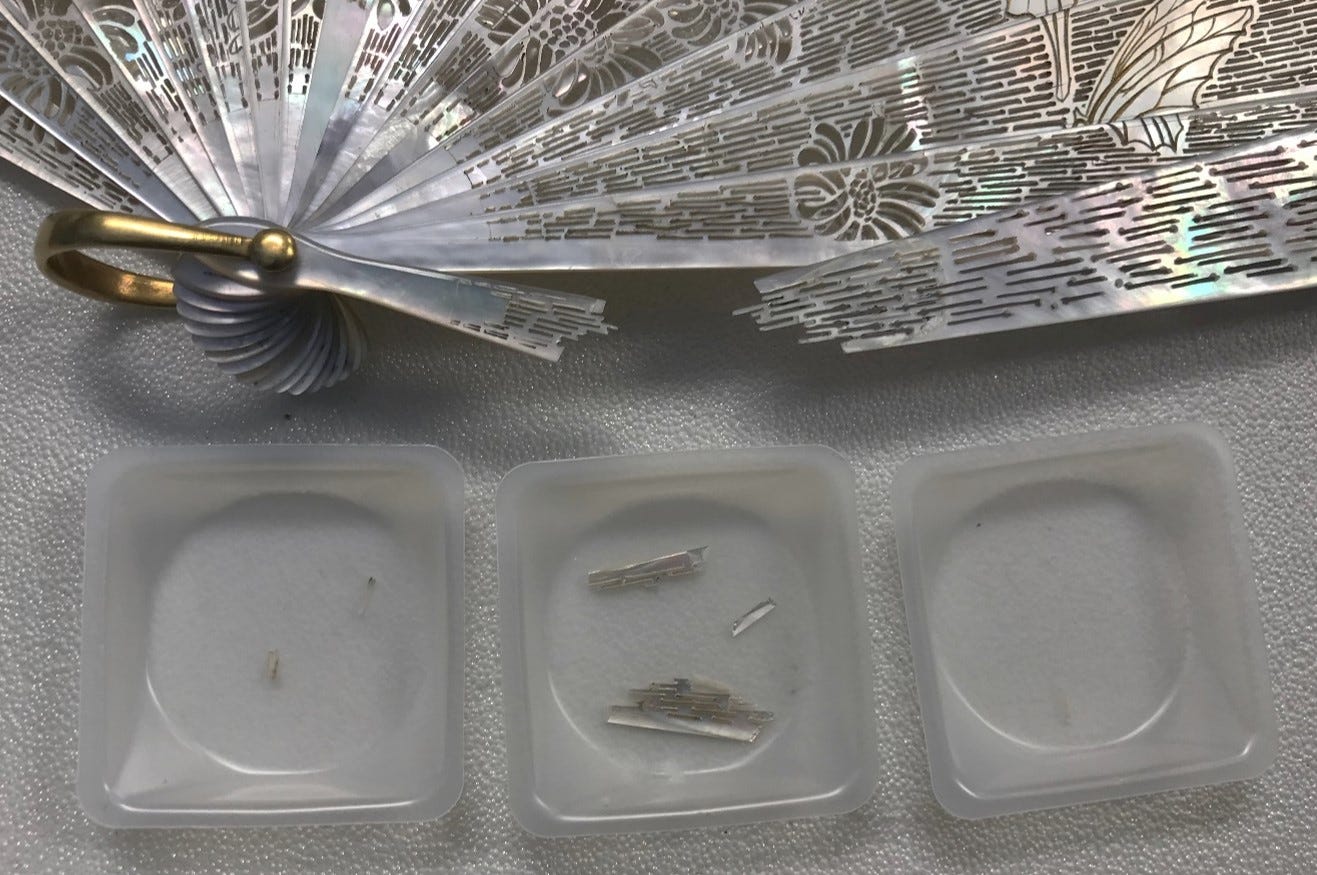
The mother-of-pearl used to create this Lalique fan is quite thin (about the thickness of a quarter) and made even more delicate due to the intricate cutout designs. Years ago, one of the slats broke into multiple pieces. Previous repair attempts used an adhesive, but with such a small surface area to join, the repairs were inherently weak and failed repeatedly. As part of my graduate internship with the museum’s objects conservation lab, I was asked to find a better solution to this challenging problem.
To do this, it is important to assess an object and determine the most appropriate treatment. After researching the object’s cultural context, I determined that, as an Art Nouveau luxury decorative arts object, the fan’s beautiful appearance is paramount to its core meaning. The object is no longer visually coherent in its current damaged state, and repairing it would return a degree of visual legibility to the object consistent with Lalique’s artistic tradition. Its present condition also renders the object unstable and vulnerable to further damage, so repairing the area would minimize risk. With these considerations in mind, I decided to learn as much as I could about the object and how it was made, in order to develop an appropriate treatment plan.


Examining the fan under a microscope revealed fascinating details. While at first glance the slats appear to be made in one piece, skillfully executed joins are visible under magnification (fig. 3). The artist used at least two pieces of mother-of-pearl to create each slat, employing a sophisticated splicing technique to make the joins as invisible as possible. I could also see that the artist first mapped out the designs in shallow incised lines (fig. 4). The narrow slits were made using a small drill to pierce holes, which were then elongated into slits with a jeweler’s saw.
The front of the fan is also decorated with incised lines, which are filled with gold-colored material . The incisions have angled sides, indicating that they were made using a pointed tool. Under the microscope, the gold material looks like many individual particles as opposed to a single sheet of metal, suggesting that it was applied as a powder rather than as a leaf (fig. 5).
At first glance the gold-colored material and metal loop appeared to be pure gold; however, things are not always as they seem! I used portable X-ray fluorescence (pXRF), a non destructive analytical technique that provides information on elemental composition, to find out more. I discovered that the gold-colored material contains brass, a copper and zinc alloy, along with some gold. My analysis of the metal loop suggested that it is likely composed of a copper alloy base metal that has been gold plated.

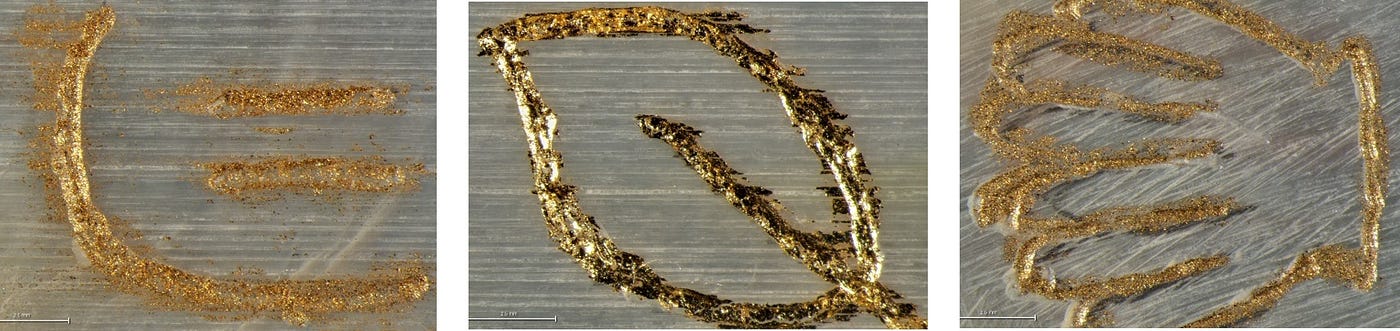
Next, I created mock-ups to gain a hands-on understanding of how the fan was made. Using sample pieces of mother-of-pearl, I created incised channels with a Dremel tool and tested three methods of applying gold-colored fill: flash gilding (gold powder applied over a binder), shell gold (gold particles suspended in a gum arabic medium and applied as paint), and mordant gilding (gold leaf applied over a binder) (fig. 6). I found that the flash gilding method gave an appearance most similar to the areas on the Lalique fan. This theory is further supported by the presence of stray gold-colored particles in areas of the fan not intended for decoration, which could easily occur when working with loose powder (fig. 7).
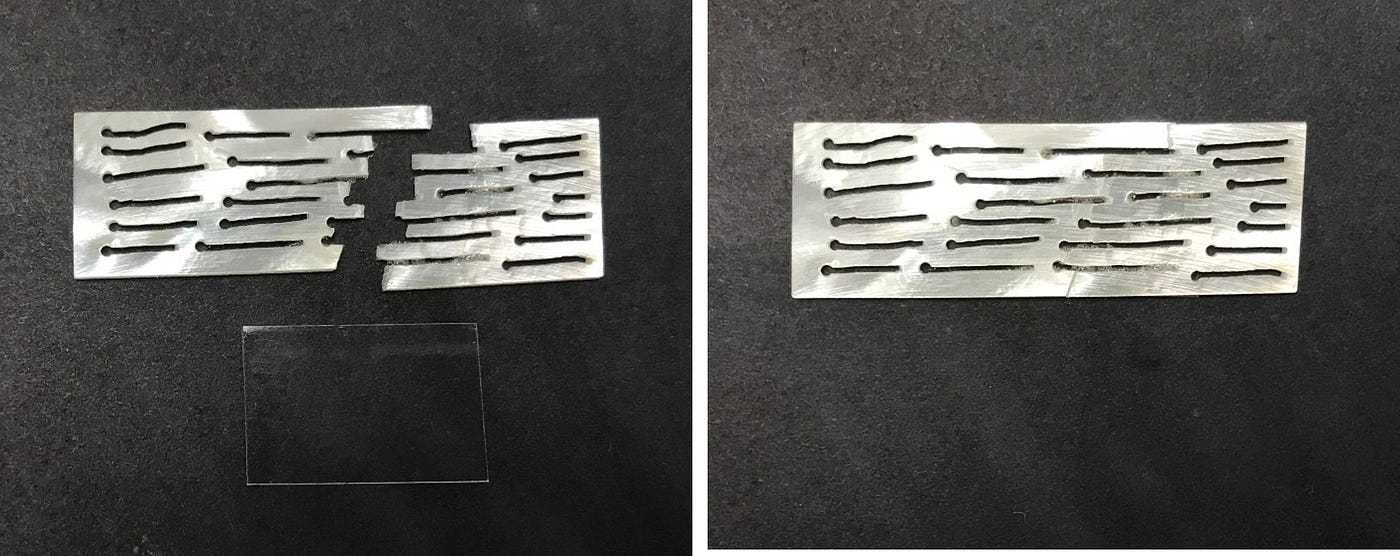
The damage to the fan’s outermost slat had resulted in a complex break with multiple separate pieces. Because previous repair attempts using adhesive alone had failed, I decided to try using a backing material to support the damaged area from behind. I chose Mylar, a thin polyester film, as it is transparent and would not disrupt the visual effect of the delicate cutouts but it is also strong and rigid enough to provide adequate support to the damaged area. To test this method, I made another mock-up re-creating the fan’s cutout technique, then broke the mockup in half and adhered the Mylar backing in place (fig. 8).
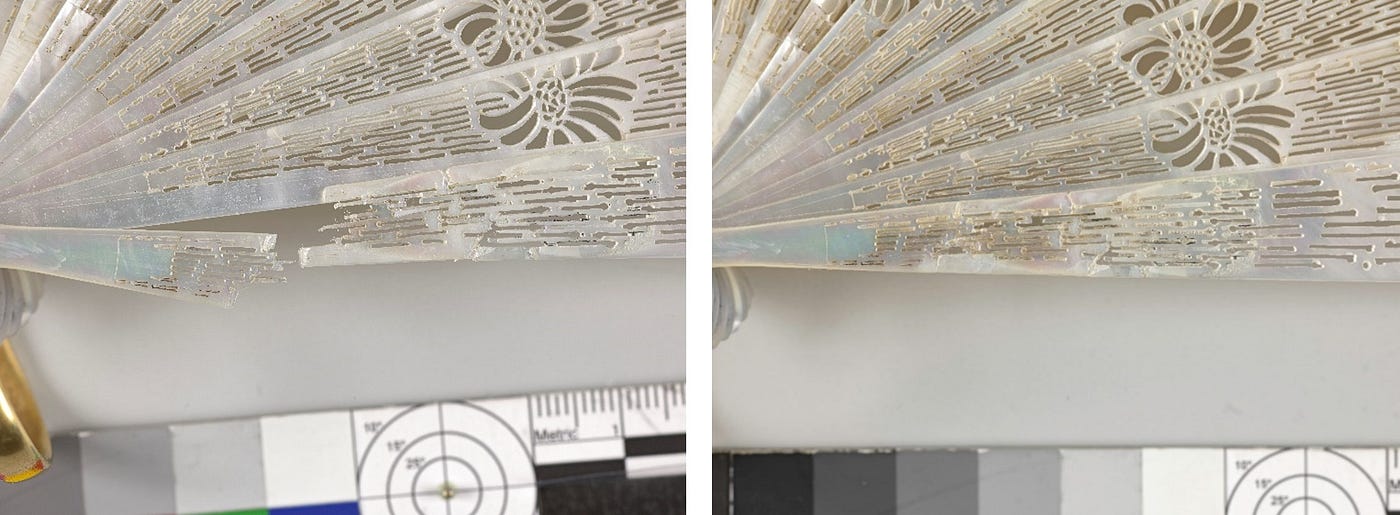
After completing the mock-up, I was able to successfully repair the original fan (fig. 9). The result is an object that is now visually coherent and consistent with the artist’s originally intended appearance (fig. 10). It is also more structurally stable and can be safely displayed in the future.
Zoom in on this French fan and several others by searching the keyword “fan” in Collection Online. Which design catches your eye?
[ad_2]
Source link


