
Doodle Weaving – ARTBAR
5 min read [ad_1]
If I had to choose one art medium for the rest of my life it would be fibers. I am always drawn to them, even from an early age when I only wanted to wear corduroy pants because I could run my fingers across the grooves and make a cool sound. My focus as an art major in college was textile design, and in my creative career over the past 30 years I have started a children’t clothing company, a quilting company, and there isn’t one wall in this house that doesn’t have one of my homemade fabric banners (wait until you see my next post!). I am saying all this to tell you that I finally tried doodle weaving and I want to do nothing else all day every day!!
The best part is that there are really no mistakes to be made… just experimentation and color exploration. And you barely need any supplies, and there is no mess, and you can take them on a trip, and children as young as four can make them too. So many reasons to makes one! Do you want to give it a try? Ok, good. Let me show you how it’s done.
Supplies Needed for Doodle Weavings:
~ Piece of cardboard for the loom (mine is 10.5″ X 6.5″)
~ Scissors
~ X-acto knife
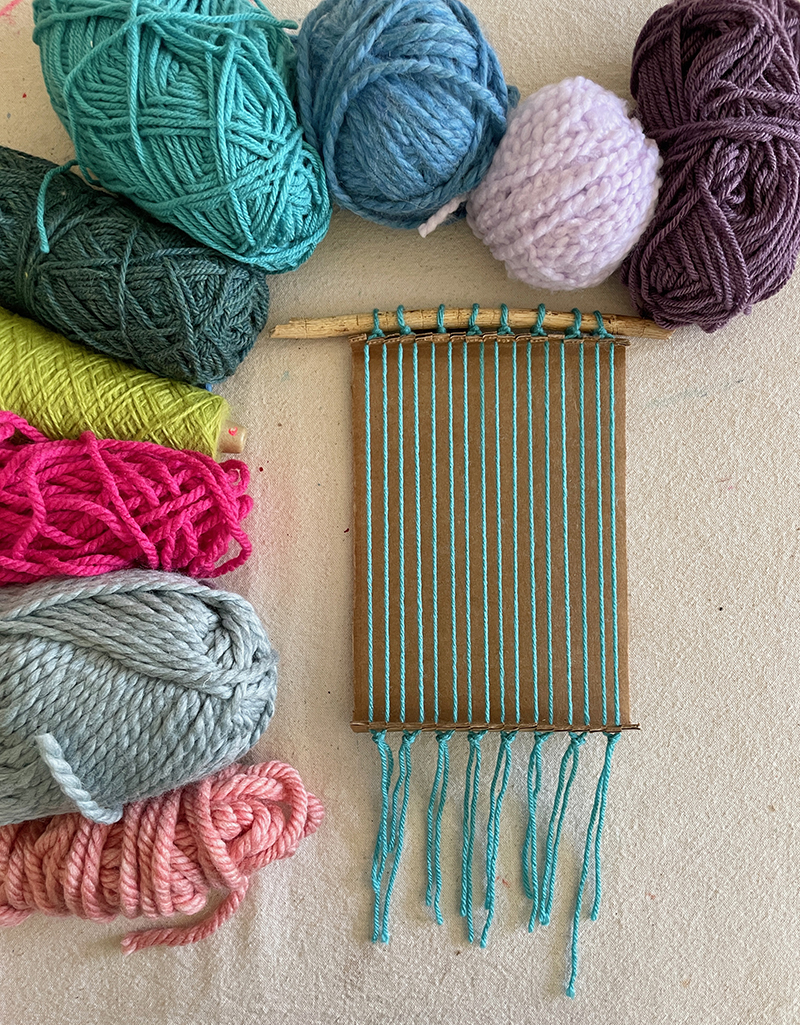
~ Yarn in various weights and colors
~ Plastic lacing needle or masking tape
~ Stick
~ Fork (for pushing down the weft so it fits snuggly together without gaps)
How to Make a Doodle Weaving:
1. First, make the cardboard loom.
Step 1: Cut a rectangular piece of cardboard, I happened to already have a piece that was 6.5 inches wide and I cut the length to 10.5 inches.
Step 2: Fold the ends up about 3/4 of an inch. You’ll need to “score” the back with an X-acto knife and then bend it up. This means you cut a shallow line at the point where you want to bend it on the opposite side to help bend in a straight line.
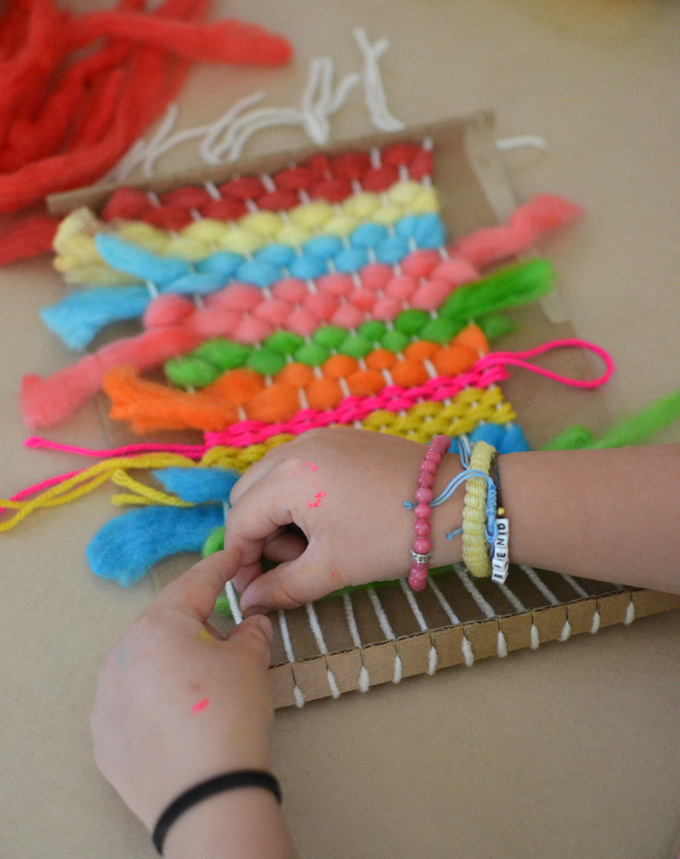
Step 3: Cut an even amount of slits with scissors on either end for the warp (that’s the stationery yarns that go up and down). I made 16 slits because I wanted my warp to be tight. But if you are using a lot of heavy, thick yarn or doing this with small children then maybe you want to do 12 slits. You can see these rainbow weavings that we did in art camp for a loom with 12 warp threads.
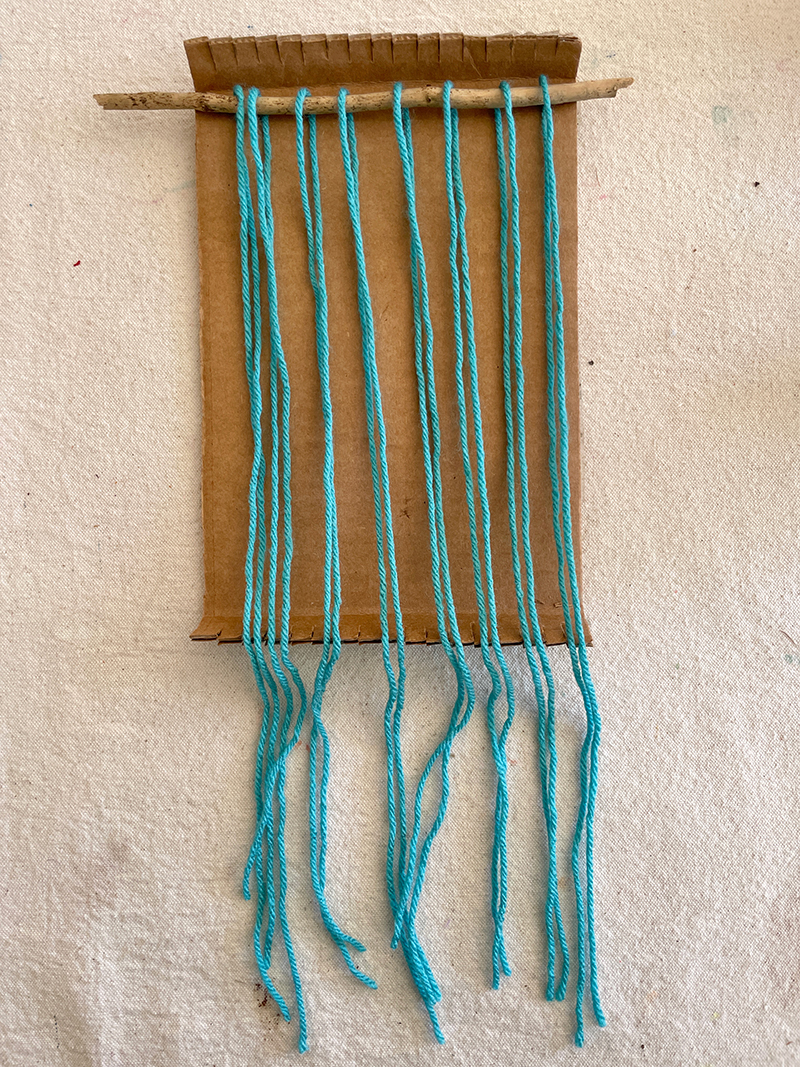
2. Attach the warp.
Step 1: Cut one warp yarn for every two slits. I cut 8 very long pieces. Each yarn should loop around the top and hang down at the bottom to create the fringe.
Step 2: Double-knot the top around the stick, above the loom, then press the yarn into the slits.
Step 3: Press the other end of the yarn into the bottom slits and then pull so the tension is not too loose and not to tight, but making sure tension is equal with all warp threads.
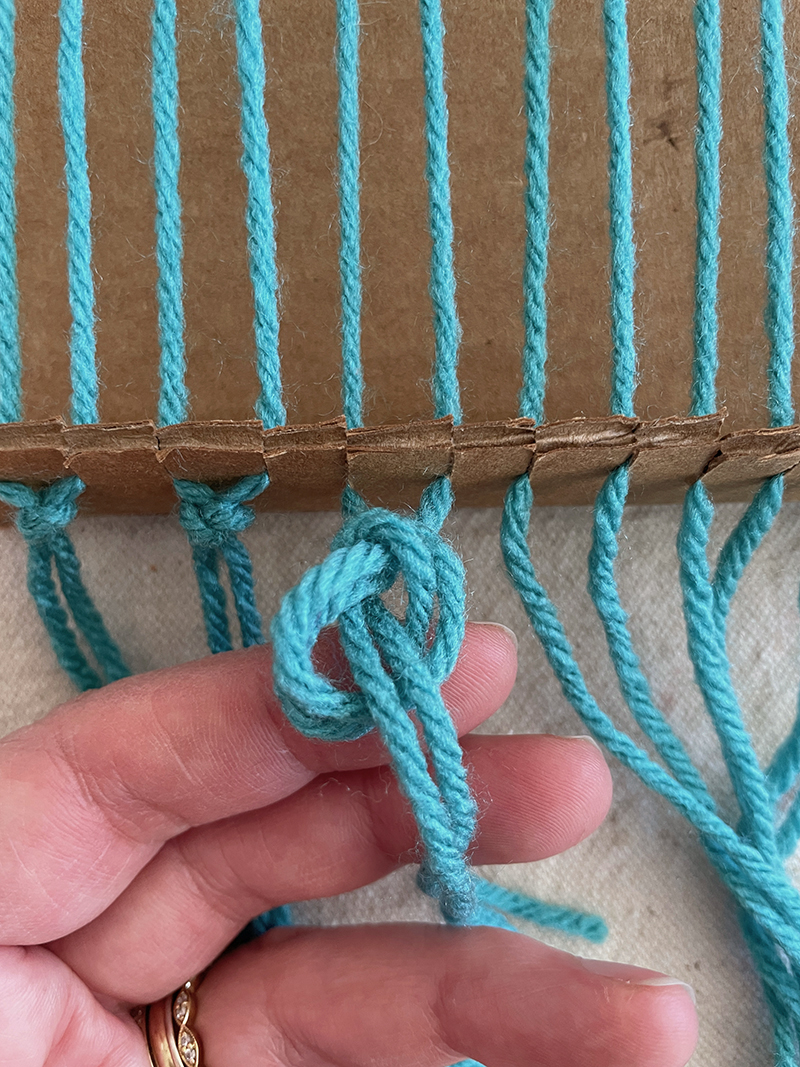
Step 4: Tie knots at the bottom to create the fringe. Don’t trim the fringe yet, wait to do that at the end.
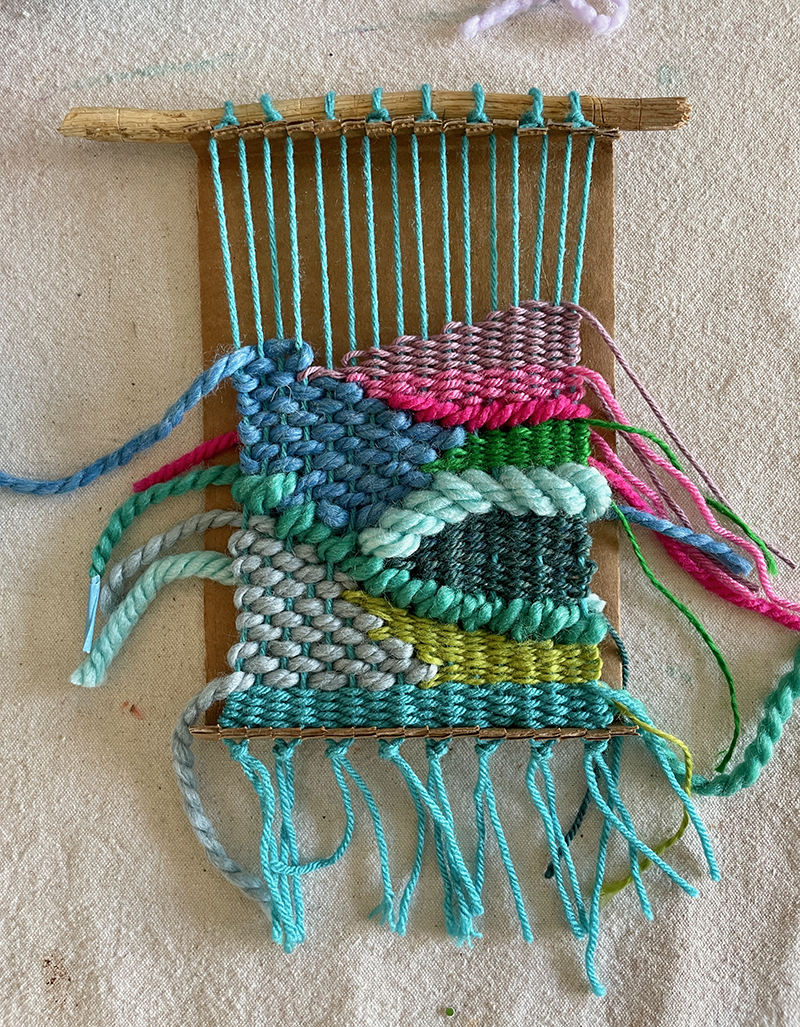
3. Begin your weaving.
Step 1: Choose your weft colors (the yarns that go across) and pick one color to start. If you have a needle, great. If not (I couldn’t find mine) you can tape the end of the yarn like a shoelace which helps weave through the warp.
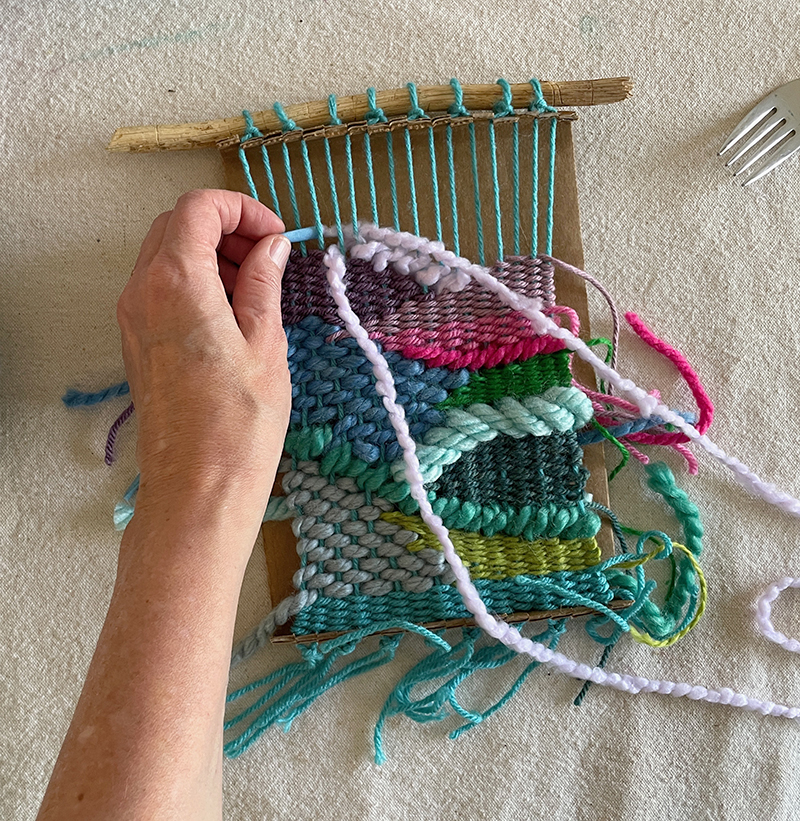
Step 2: Beginning at the bottom, weave a few rows just straight across. If you’ve never done weaving before, take a look my weaving with kids post which explains in detail how to weave. It’s basically just over and under, then back across in the opposite over-under pattern. It’s not tricky, but it can be easy to drop a warp thread or forget to change pattern on the way back. So after each run through, use your fork to push down the weft and eyeball that things look good. And remember to be careful not to pull the yarn too tightly on either side. This will distort the weaving. Young kids do this most of the time, but you can teach them to watch out for that.
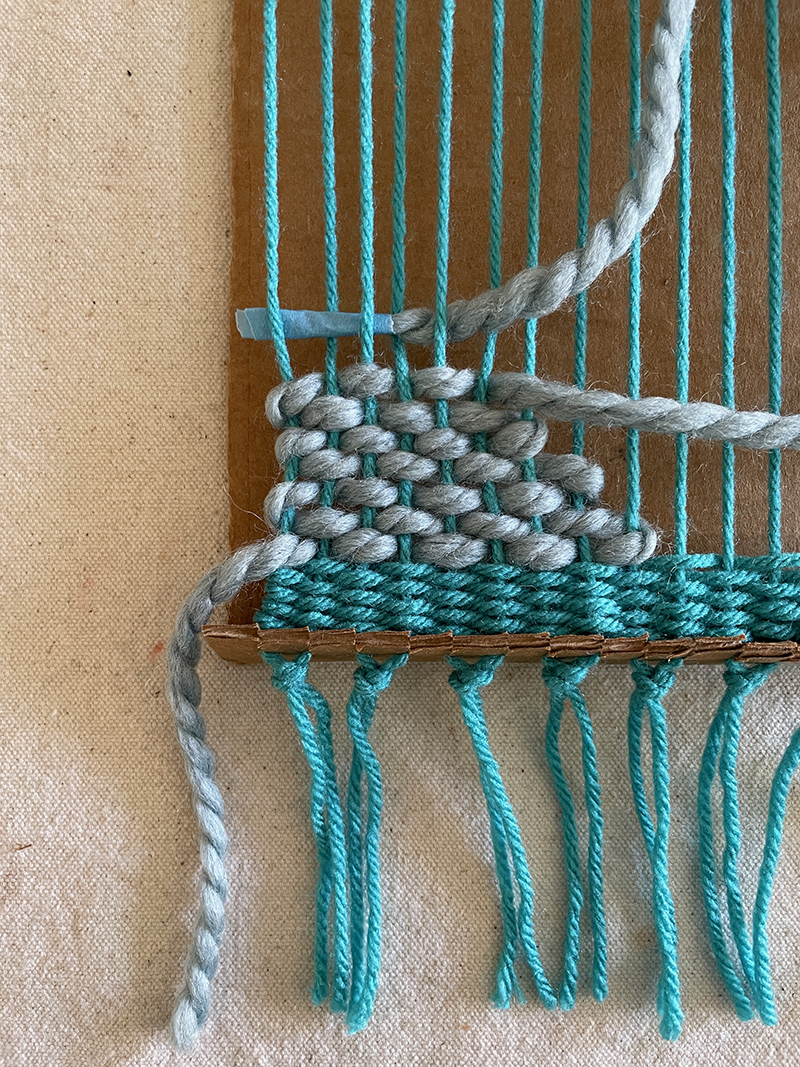
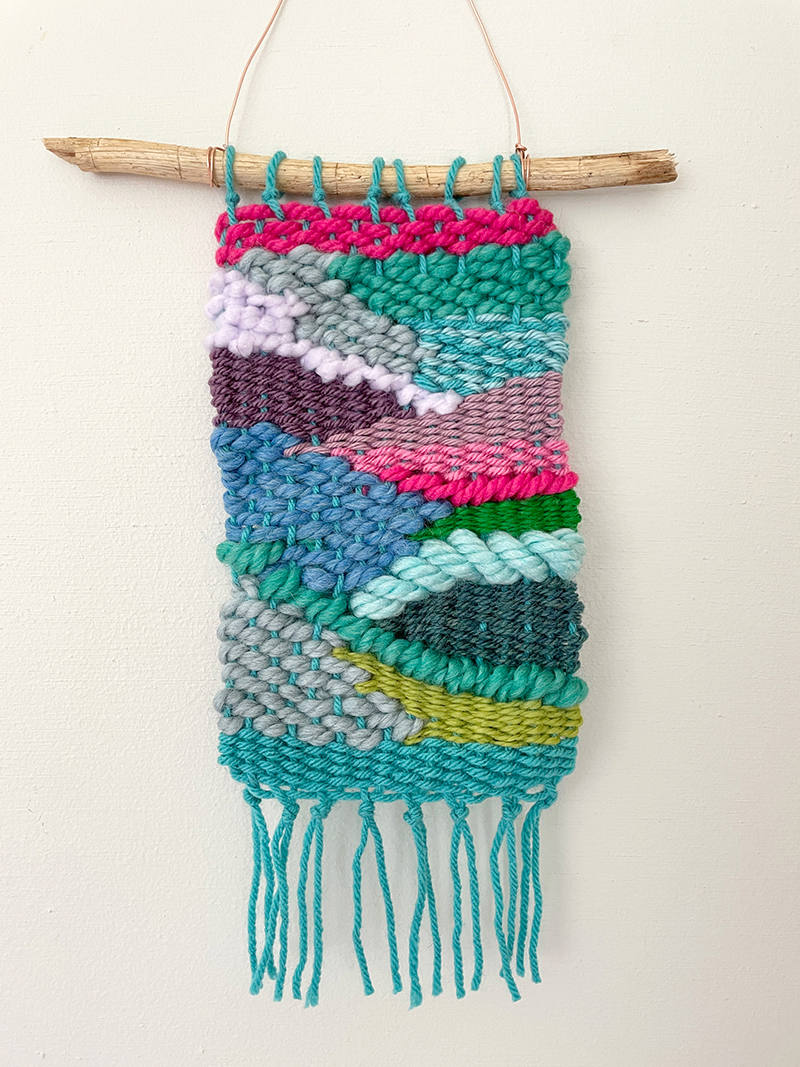
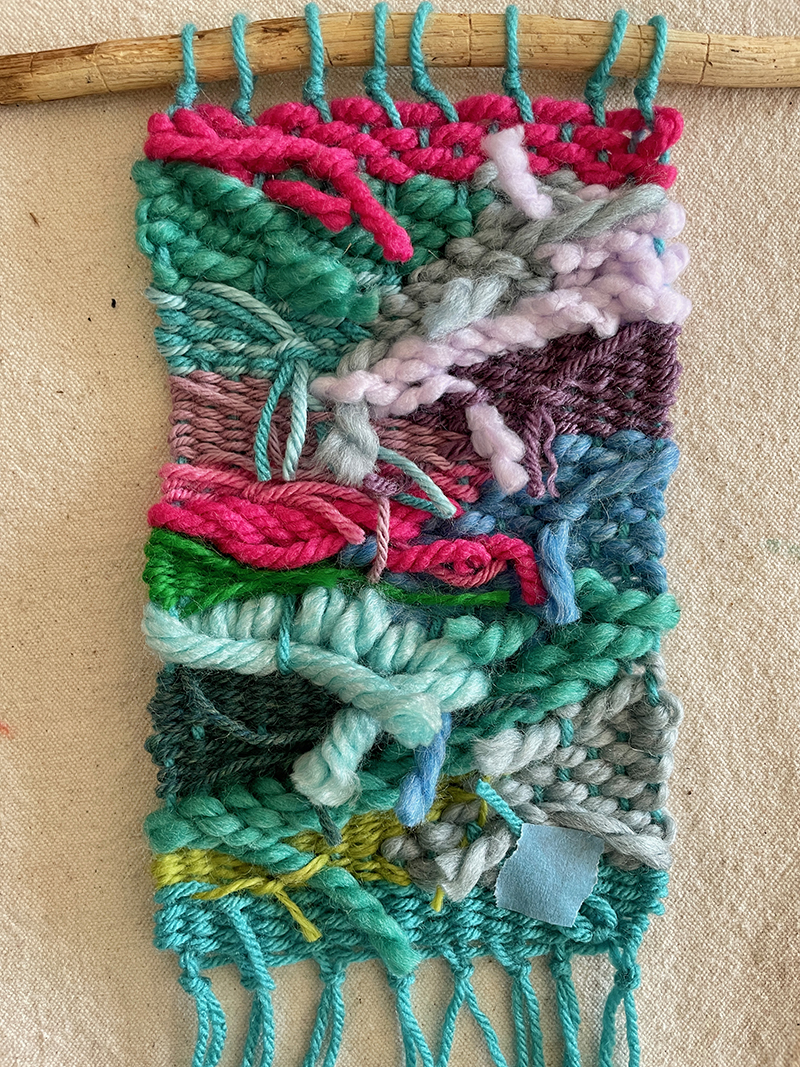
Step 3: After you have a few rows on the bottom, you can start “doodling” with different yarns. Start anywhere and just create a shape. I was loosely thinking of mountains when I made this which helped in my doodling.
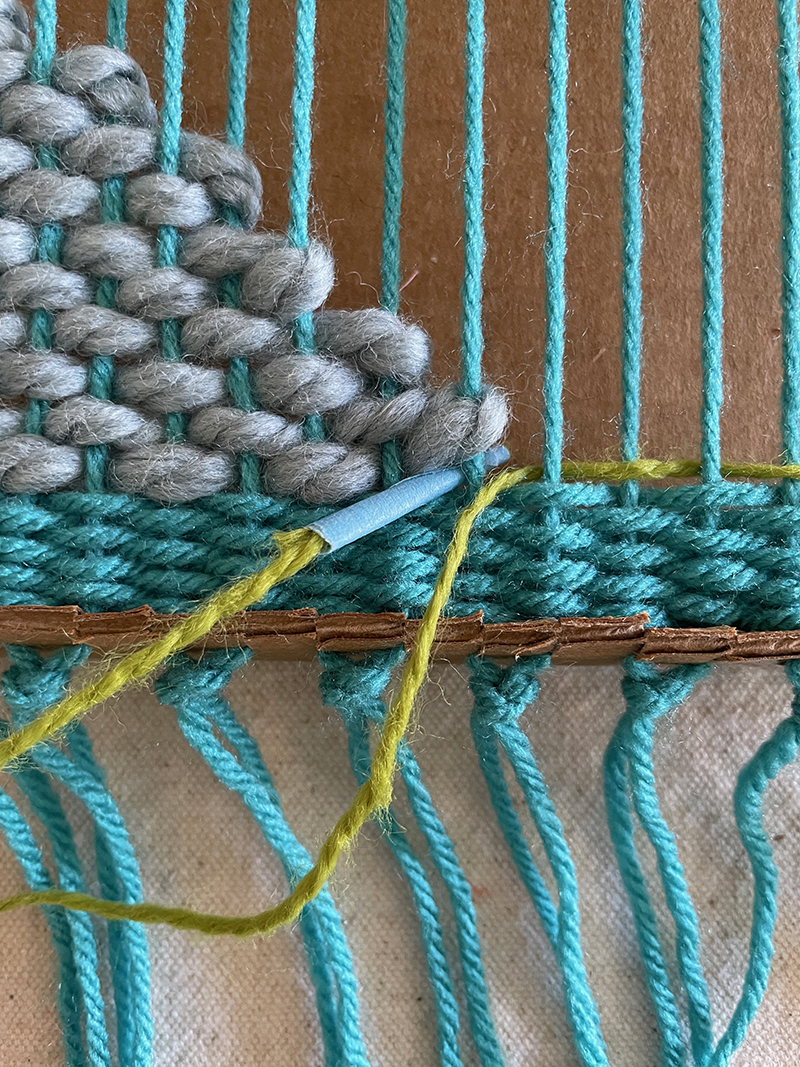
Step 4: When you’re ready for the next color, just start next to the last color, even if you’re starting in the middle. To avoid gaps in the weaving, make sure that the next color is woven over some of the same warp yarns that the last color used. But if you do find that there are gaps at the end, you can also just go back and fill them. This is doodling, so anything goes!
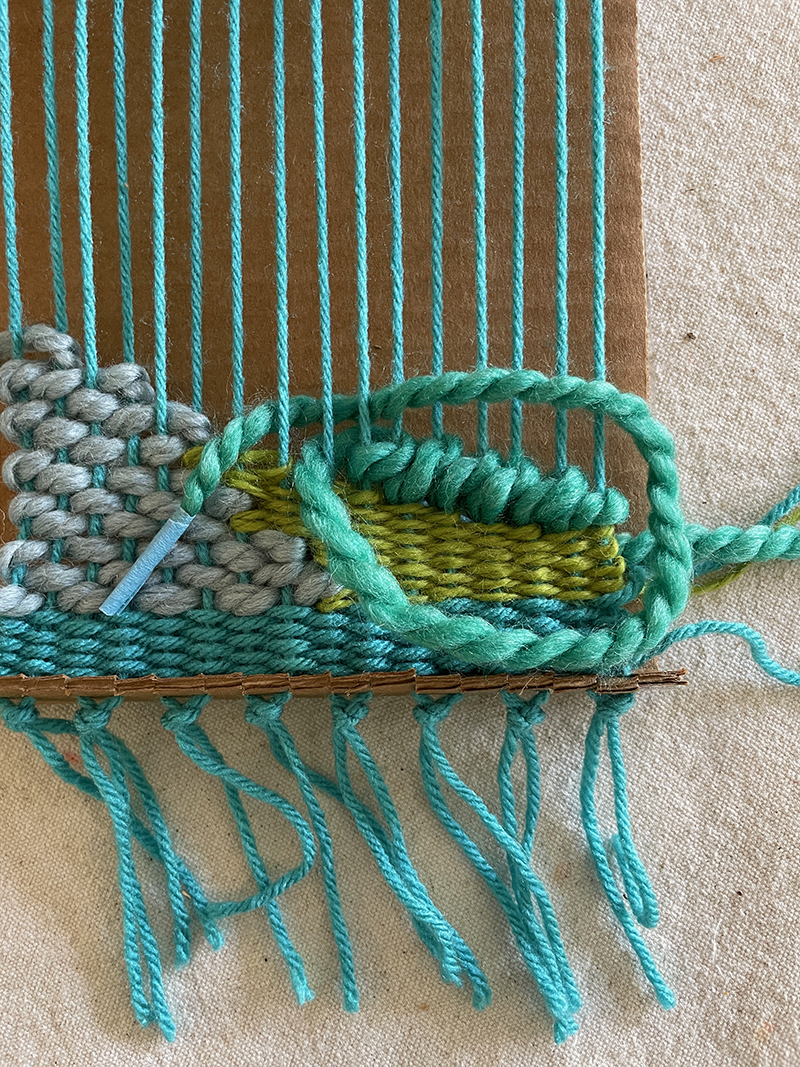
Step 5: Try some other kinds of weaves. I don’t know what this is called (here is a glossary of different weaves if you’re interested) but I just made it up and it looked cool and interesting. I like mixing puffy, thick yarn with thinner yarns. For me, the color is as important as the texture.
Remember, each time you start or end a new color, leave a tail. You can even leave the tape on the end because you can use it later to finish the back.
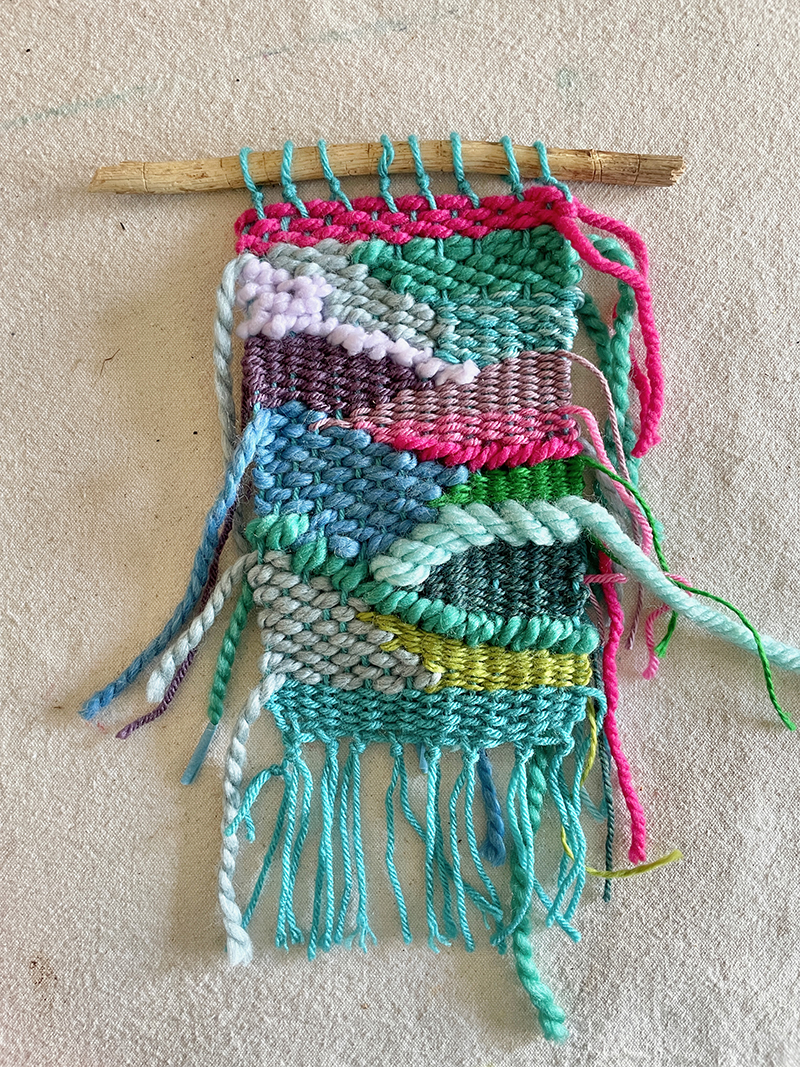
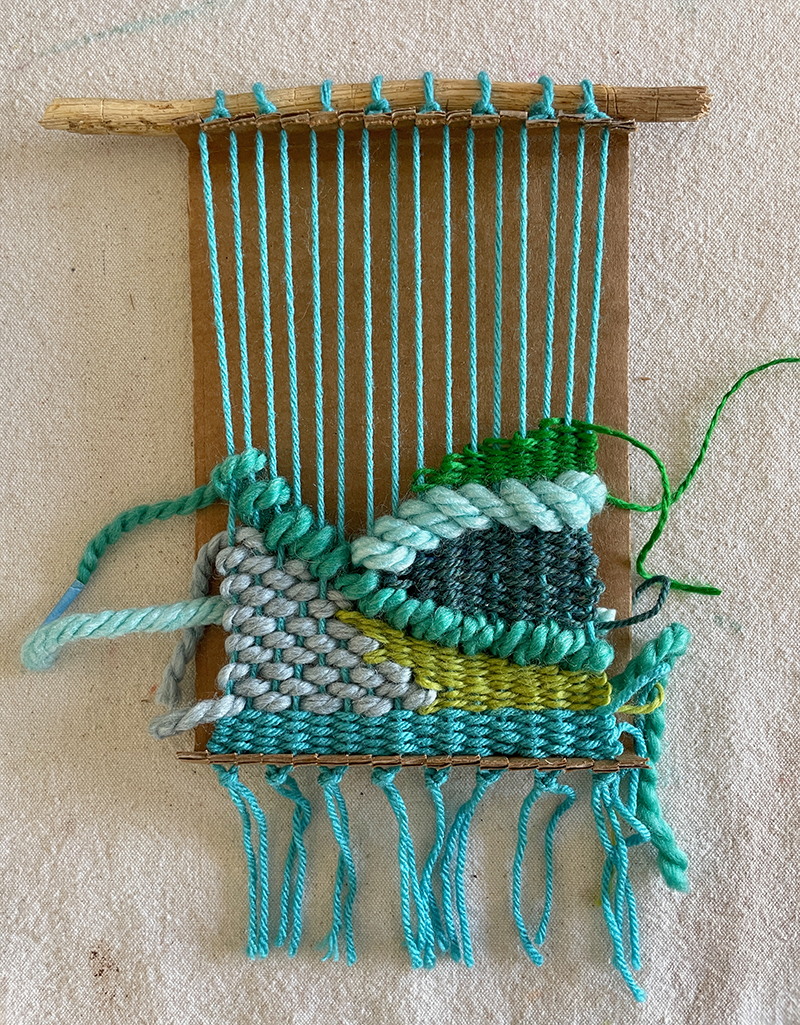
Step 6. When you get to the top, weave a few straight rows to finish. Carefully pop the warp yarns off of the loom. You will find that there is a little extra space at the top and bottom. You can either push the weft yarns around a bit to fill the space, or weave a couple more rows to fill the space.
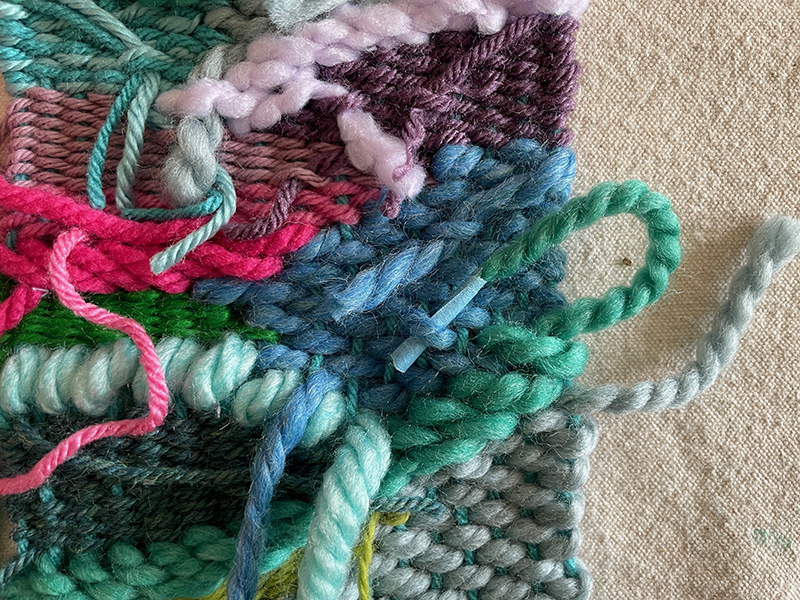
Step 7: Now it’s time to finish the back. First, make sure all the tails are looped through the final warp yarns at the ends. Then, flip your weaving over and just start weaving the tails back through some of the warp or weft threads. You can either use the taped end, or use a dull pencil to pull up a loop slightly, then tuck the tail under.
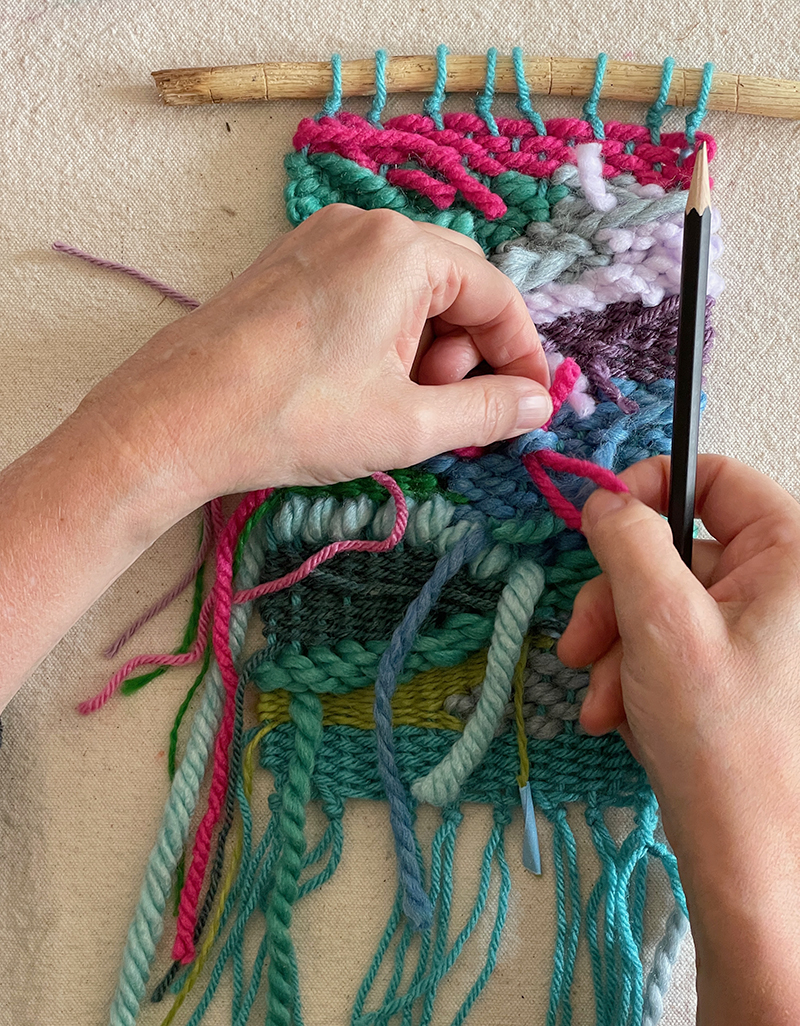
When all the tails are tucked in (you may have to use masking tape occasionally if there is nowhere to tuck something), snip them to about an inch or so.
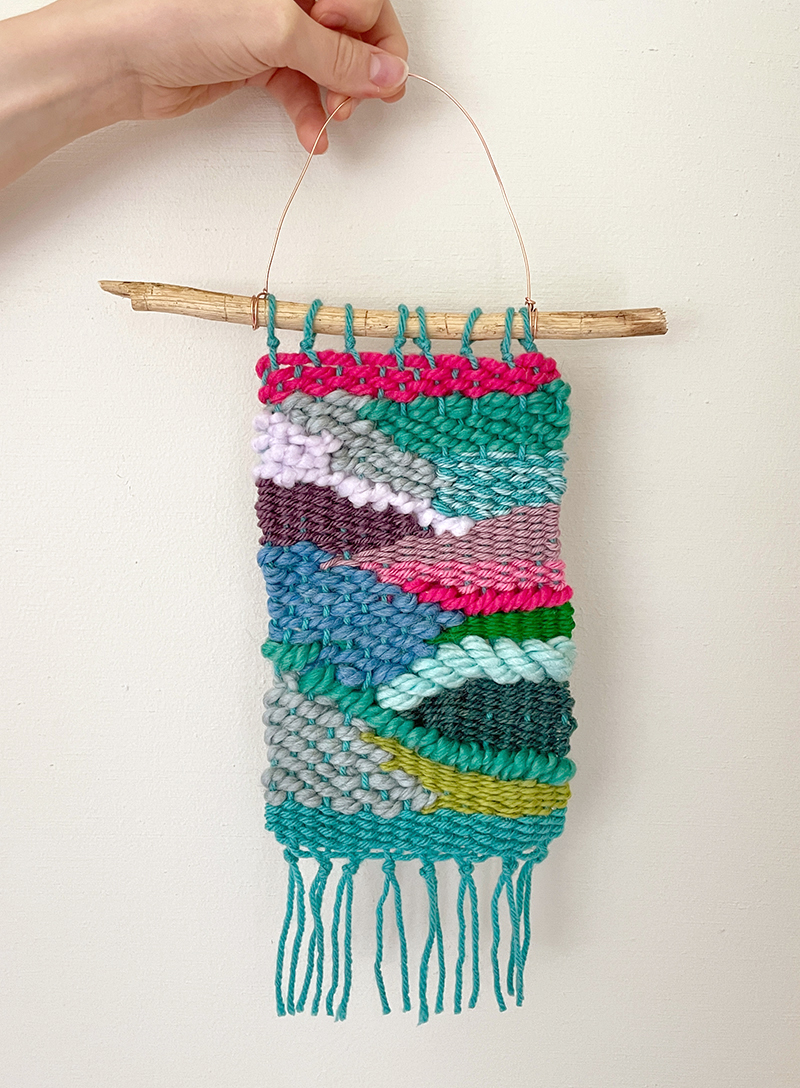
Step 8: Trim the bottom, add a wire hanger, and you are done! I hope you love your weaving and are very proud of it. I love mine so much and can’t wait to make more!
xo, Bar
– – – – – – – – – – – – – – – – – – – –
Did you like this post? Here are some more creative ideas using fibers!
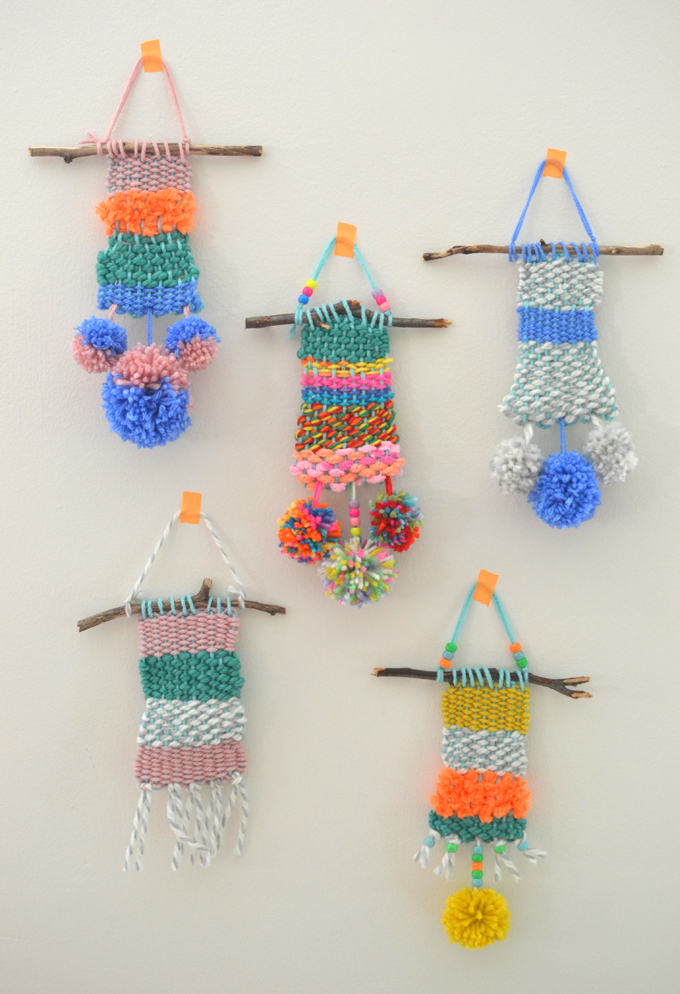
Weaving with Kids
Rainbow Weaving with Koolaid Dyed Yarn
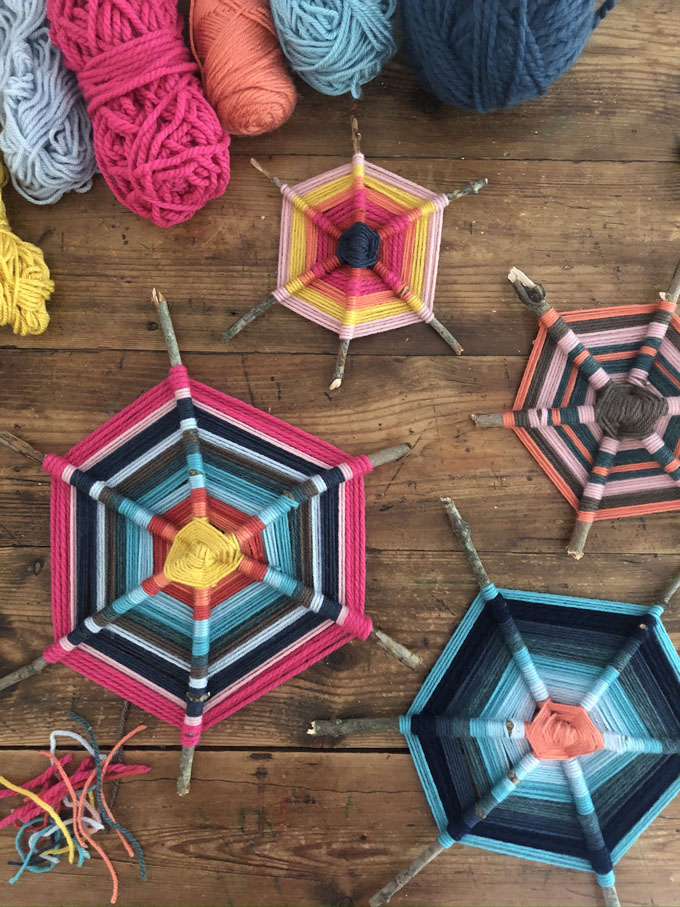
Making God’s Eyes with Sticks
[ad_2]
Source link


